
Extending Notebook-Centric AI Workflows with Jupyter AI
This article introduces how to extend your Jupyter Notebook environment into a generative AI playground using Jupyter AI. From installation methods to chat interface usage, key slash (/) commands, and %%ai magic commands, we cover the essential features step by step.

Table of Contents
- What is Jupyter AI?
- System Requirements and Installation
- Using the Chat Interface
- Slash (/) Commands
- Magic Commands (
%%ai) - Conclusion
1. What is Jupyter AI?
Data scientists and developers have long used Jupyter Notebook to simultaneously conduct experiments, perform analysis, and create documentation. However, tasks like code writing, document summarization, and data visualization still require significant manual work, and leveraging AI capabilities often means opening separate tools or websites.
Jupyter AI addresses these limitations. By extending the notebook environment itself into a generative AI playground, it enables:
- Automatic code generation and error correction
- Data analysis and visualization support
- Document-based question answering
All in one place. In other words, Jupyter AI is not just an extension—it's a core tool that enables the transition to an "AI-First Notebook environment".
Key Features:
- Interact with AI models using
%%aimagic commands - Works in any environment using IPython kernel (JupyterLab, Jupyter Notebook, Google Colab, VSCode, etc.)
- Conversational AI assistant available through JupyterLab's native chat UI
- Support for various AI model providers (Anthropic, OpenAI, Google, Hugging Face, etc.)
System Requirements:
- Python 3.9 - 3.12
- JupyterLab 4 or Notebook 7
- Model provider API keys
2. System Requirements and Installation
※ Note: If you're using the PAASUP DIP platform, you can use Jupyter AI immediately through the Kubeflow catalog without a separate installation process.
# Install with full features (%%ai magic + JupyterLab extension)
pip install 'jupyter-ai[all]'

# Note: To install only magic commands
#pip install 'jupyter-ai-magics[all]'
Restart JupyterLab after installation.
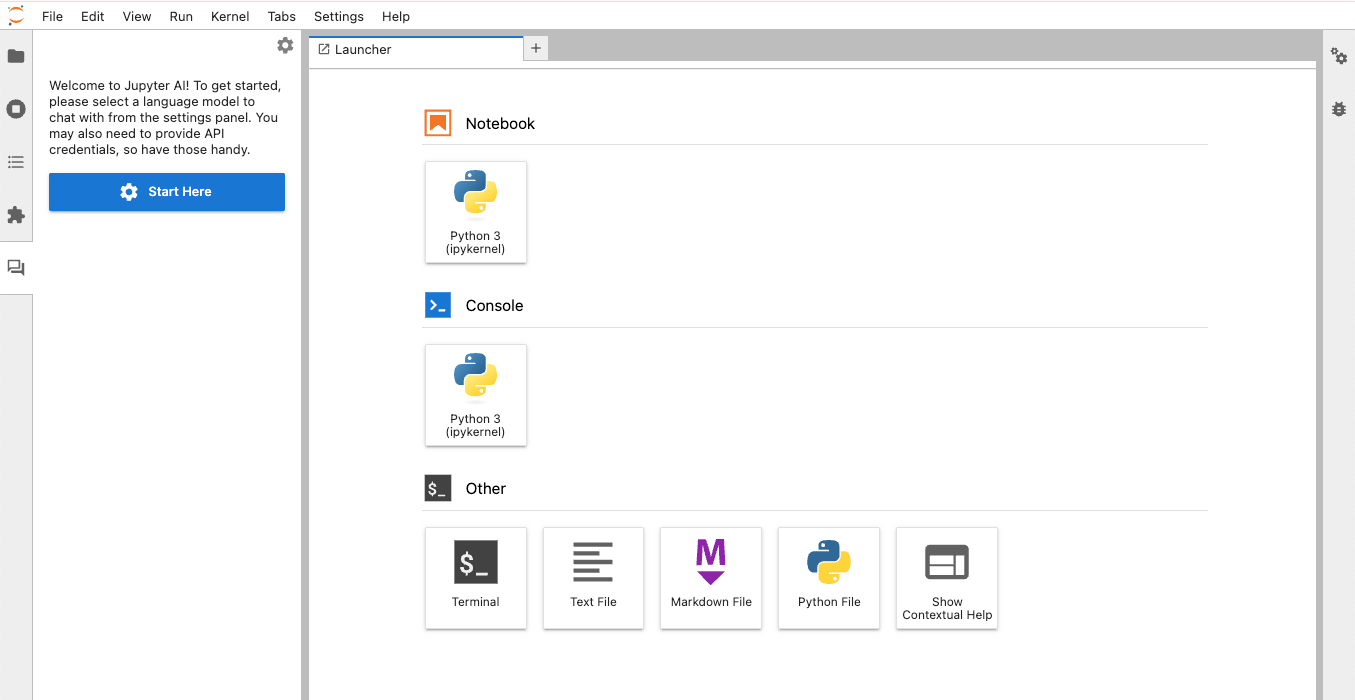
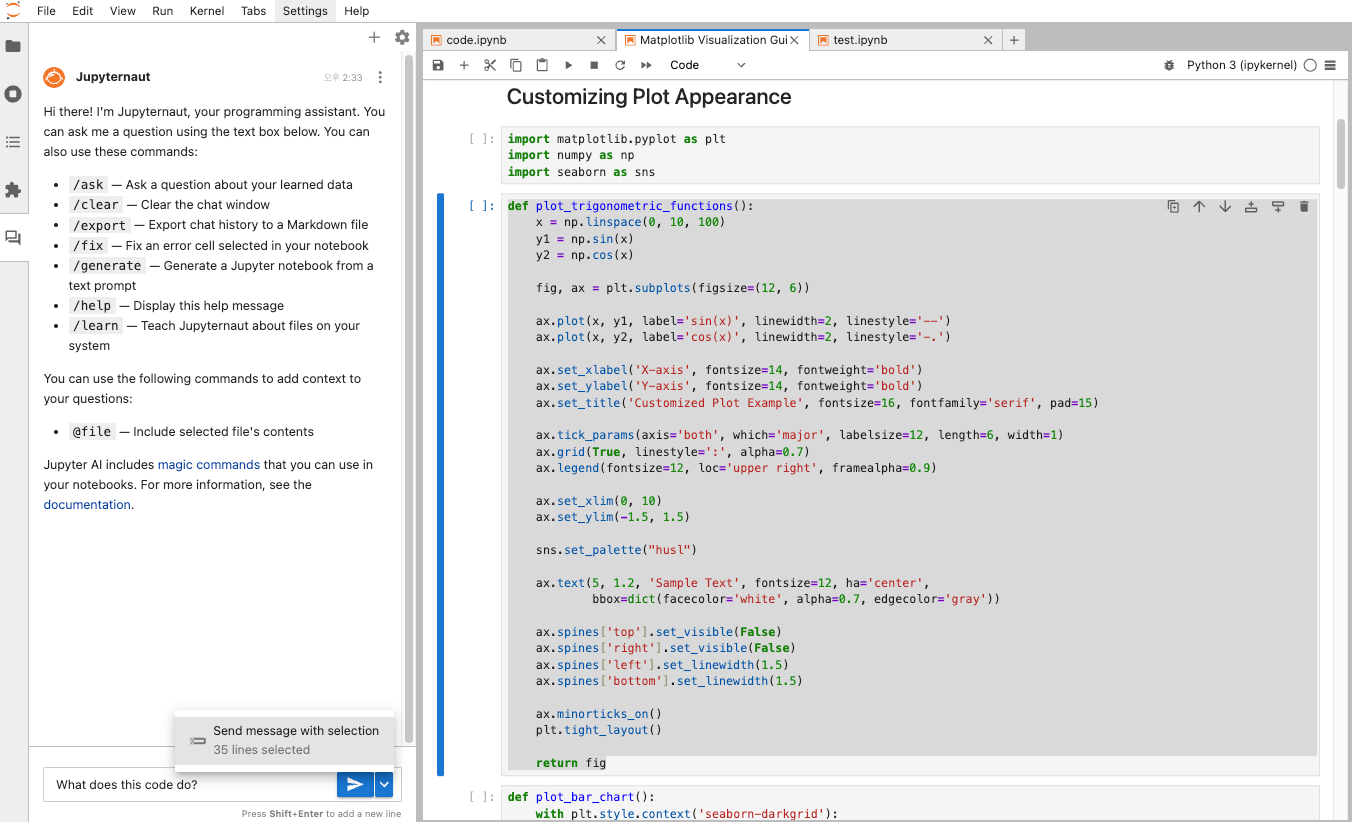
3. Using the Chat Interface
Basic Chat
- Click the "Chat" icon in the left panel of JupyterLab to open the chat interface.
- Configure language model and API key Complete the configuration for Language model and Embedding model. (Click the settings icon in the upper right corner of the chat interface)
- Language model: Generates responses to user messages
- Embedding model: Learns local data and uses it when answering questions
-
Example:
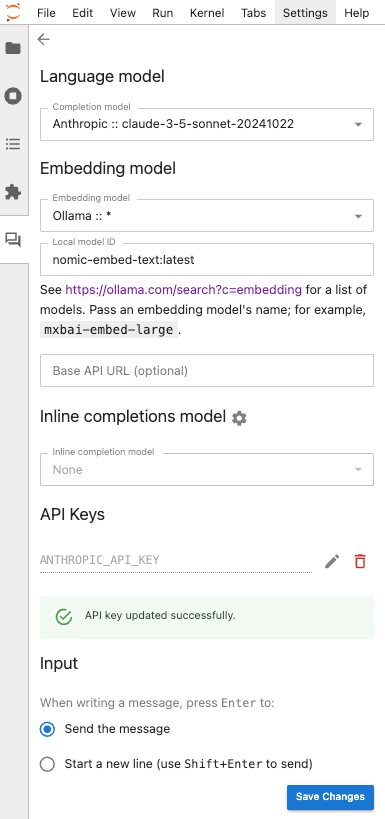
- Ollama's default
Base API URLis127.0.0.1:11434(local port:11434). To use an Ollama server with a different IP or port number, configure it inBase API URL (optional).
- Ollama's default
- Enter your question in the message box at the bottom Type your message in the text box at the bottom of the chat interface and send it to receive responses from Jupyternaut, the Jupyter AI chatbot.
-
Example:
Write a function in Python that multiplies two numbers.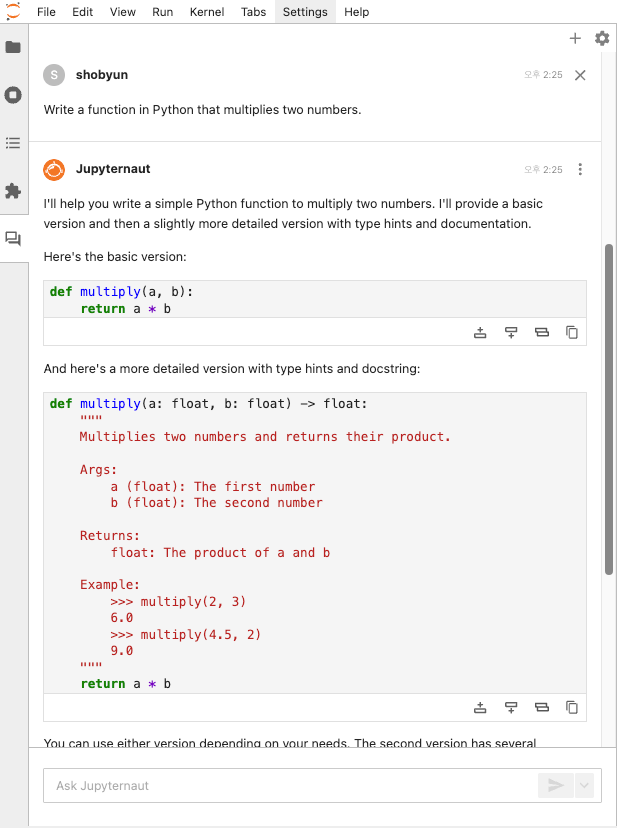
- Follow-up questions
-
Example:
Expand the function to take more numbers as inputs.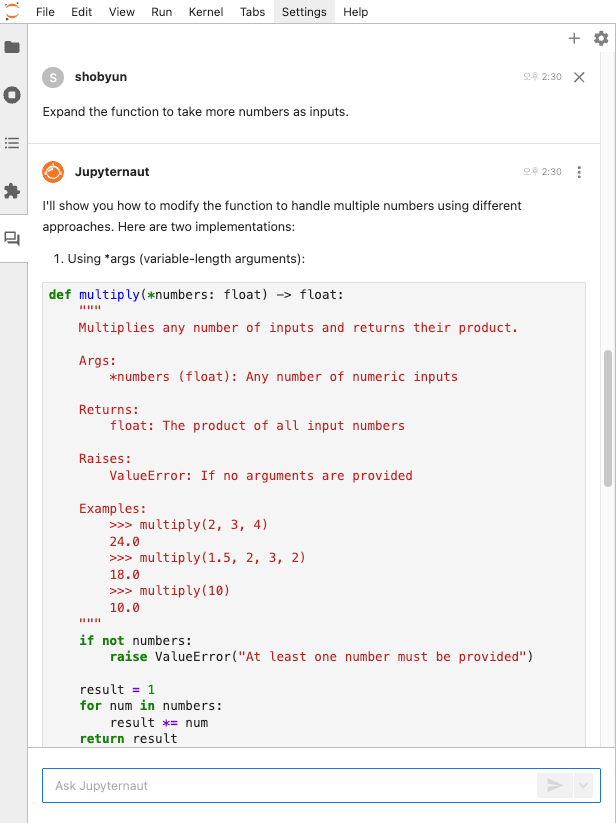
Questions Based on Notebook Content
- Drag to select a specific part of the notebook
- Enter a message in the chat panel
- Click "Send message with selection"
4. Slash (/) Commands
| Command | Description |
|---|---|
| /generate | Create a new notebook from a prompt |
| /learn | Learn from local data |
| /ask | Ask questions based on learned data |
| /export | Export chat history |
| /fix | Fix code cells with errors |
| /clear | Reset conversation |
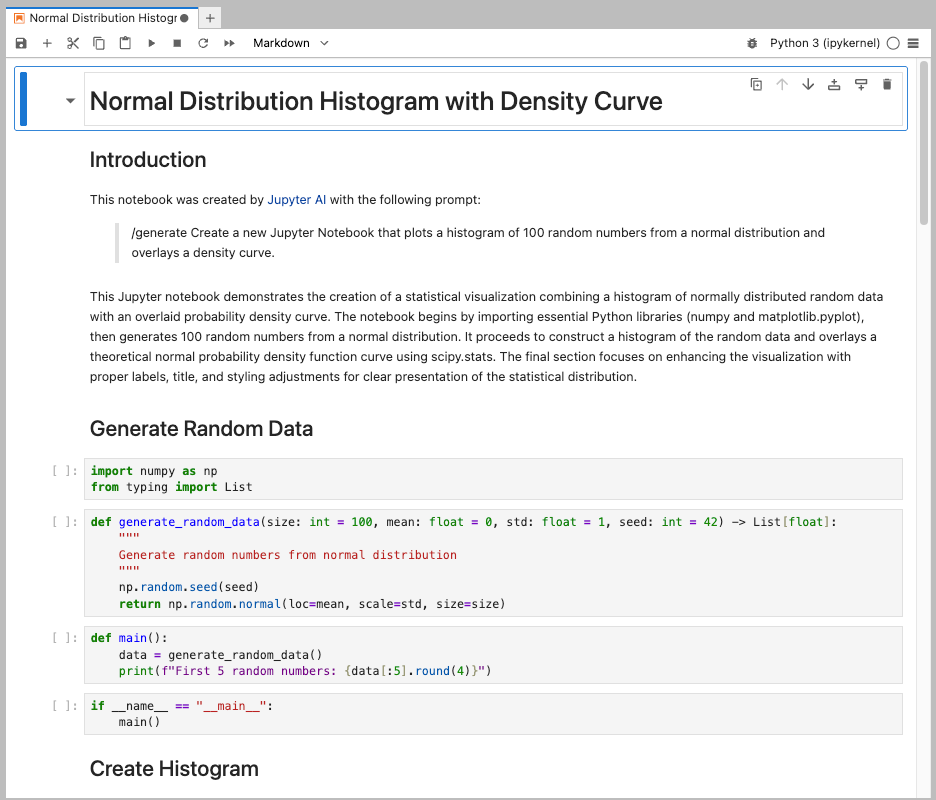
/generate
Generate an entire notebook from a text prompt.
- Example:
/generate Create a new Jupyter Notebook that plots a histogram of 100 random numbers from a normal distribution and overlays a density curve.
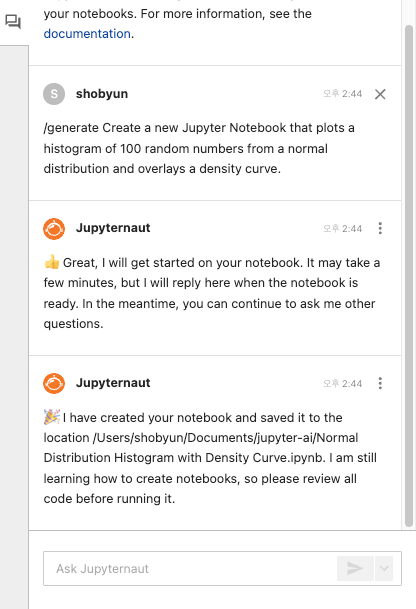
This automatically creates a new notebook file with the requested content.
/learn
Learn from local data so it can be included when answering questions.
# Basic usage
/learn <directory>             # Learn from <directory> folder
/learn **/*.ipynb              # Learn from all notebook files

# With chunk size of 500, and chunk overlap of 50
/learn -c 500 -o 50 <directory>
/learn --chunk-size 500 --chunk-overlap 50 <directory>

# Delete learned data
/learn -d                      # Delete all information learned via /learn command
-
Supported file formats:
.py,.md,.R,.Rmd,.jl,.sh,.ipynb,.js,.ts,.jsx,.tsx,.txt,.html,.pdf,.tex -
Example:
/learn docs/
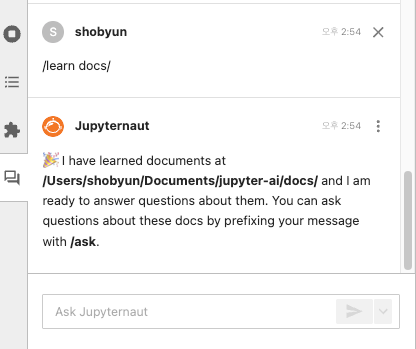
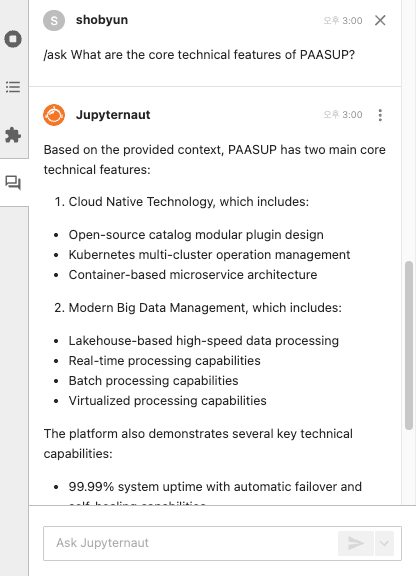
/ask
Ask specific questions about local data learned through /learn.
- Example:
/ask What are the core technical features of PAASUP?
/export
Export the current session's chat history as a markdown file.
/export                # Export with default filename (chat_history-YYYY-MM-DD-HH-mm-ss.md)
/export {file_name}    # Export with custom filename
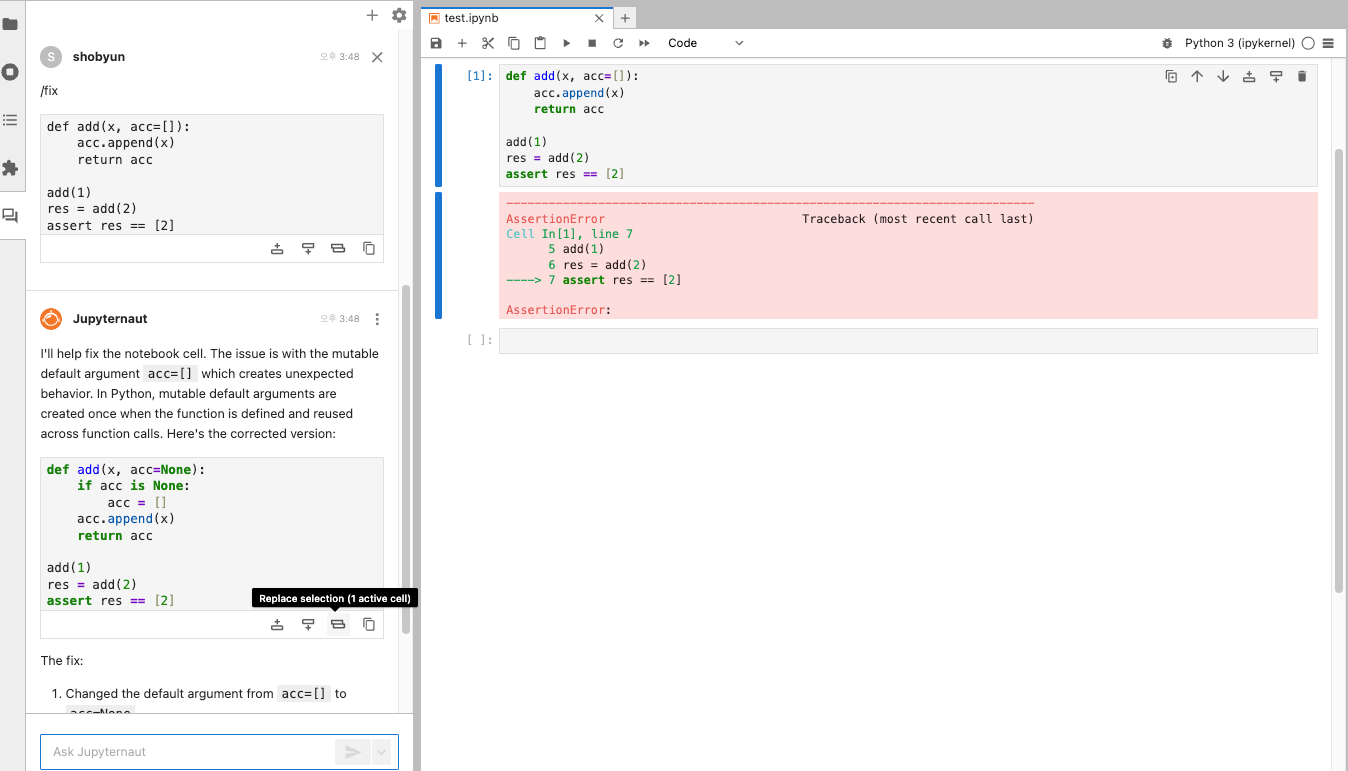
/fix
Used to fix code cells with error outputs in Jupyter notebook files.
- Type
/fixin the chat input - Select the cell with an error in the notebook file
- Click the send button
- Example:
/clear
Start a new conversation and reset the model's memory.
5. Magic Commands (%%ai)
JupyterLab, Jupyter Notebook, Google Colab, Visual Studio Code, etc. — the %%ai magic works in any environment using IPython kernel (※ For detailed usage, refer to Jupyter AI documentation)
Basic Usage
# Load extension
%load_ext jupyter_ai
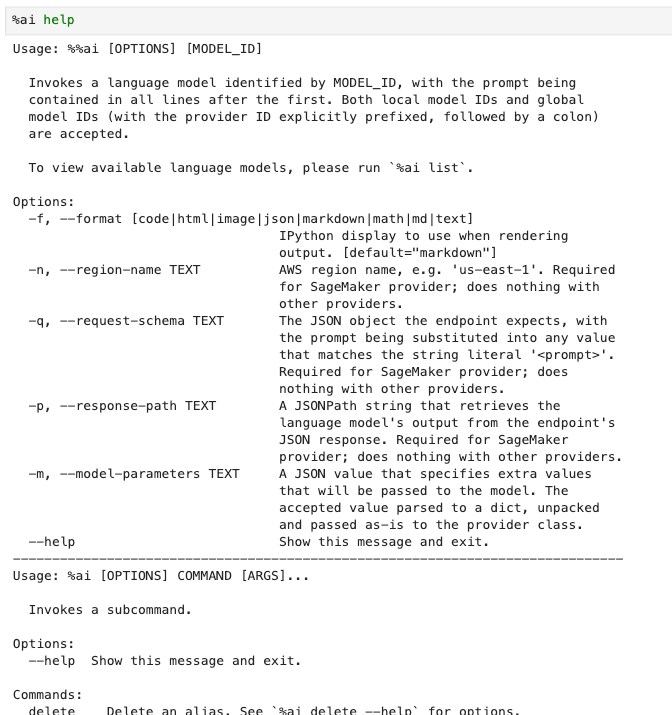
# View help
%ai help
API Key Configuration
%env ANTHROPIC_API_KEY=your_api_key_here
Check registered models:
%ai list anthropic-chat
# %ai list ← Lists all available providers and models

Register Model Alias
%ai register {ALIAS} {provider:model}
- Example:
%ai register mychat anthropic-chat:claude-3-5-sonnet-20241022
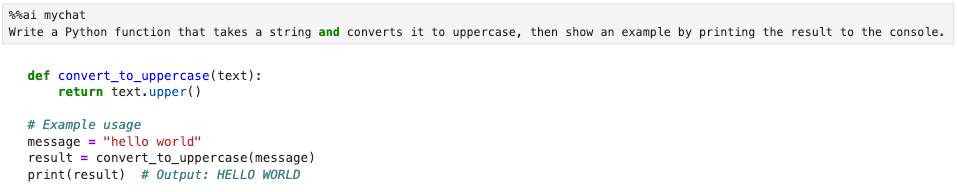
Interact with AI Models
- Example:
%%ai mychat
Write a Python function that takes a string and converts it to uppercase, then show an example by printing the result to the console.

# Or
%%ai anthropic-chat:claude-3-5-sonnet-20241022
Write a Python function that takes a string and converts it to uppercase, then show an example by printing the result to the console.
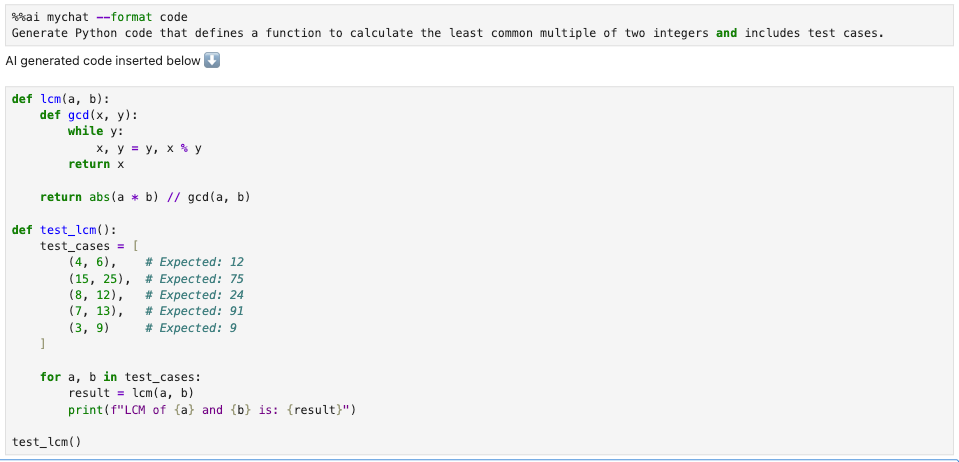
The output of %%ai commands is formatted as markdown by default. You can specify the output format using the -f or --format option.
-
Supported formats:
code- Code blockmarkdown- Markdown (default)text- Plain texthtml- HTMLjson- JSONmath- Mathematical expressionsimage- Image (for Hugging Face text-to-image models)
-
Example:
%%ai mychat --format code
Generate Python code that defines a function to calculate the least common multiple of two integers and includes test cases.

# Or
%%ai anthropic-chat:claude-3-5-sonnet-20241022 --format code
Generate Python code that defines a function to calculate the least common multiple of two integers and includes test cases.
6. Conclusion
Jupyter AI is not simply a tool that writes a few lines of code for you. By deeply integrating AI into the notebook environment, it revolutionizes the entire research and development workflow.
- Data scientists can rapidly prototype complex analysis pipelines
- Researchers can learn from vast documents and immediately query them
- Developers can delegate repetitive tasks like SQL queries or API client code to AI
Ultimately, Jupyter AI transforms Jupyter Notebook into a "productivity hub for collaborating with AI." Considering future integration with RAG, team collaboration, and data platforms, its potential will grow even greater.