
Deploying Serverless VLLM in a Private Environment
This is a practical guide for building an enterprise LLM serving environment using KServe with a vLLM backend on the PAASUP DIP platform. It presents various AI service operation methods, from programming through Jupyter Notebook to no-code web interfaces using OpenWebUI and Flowise.
목차
- Overview
- Preparing the Test Environment: Deploying Kubeflow Jupyter Notebook
- Deploying KServe
- Verifying and Configuring Endpoints
- Inference Testing with Jupyter Notebook
- Building a Web Interface with OpenWebUI
- No-Code AI Workflow with Flowise
- Conclusion
1. Overview
To operate a stable LLM service in an enterprise environment, many technical challenges must be overcome, such as complex Kubernetes configurations, MLOps pipeline construction, and the development of various interfaces.
The PAASUP DIP (Data Intelligence Platform) is a data intelligence platform that solves these complexities, allowing you to build production-level AI/ML workflows with just a few clicks.
This article explores how to build a KServe-based LLM serving environment with DIP and use it with various interfaces:
Components
- KServe: A Kubernetes-native serverless model serving platform for stable LLM deployment.
- Jupyter Notebook: An environment for API calls and testing using Python code.
- OpenWebUI: A user-friendly, ChatGPT-style web chat interface.
- Flowise: A no-code AI workflow building tool with a drag-and-drop interface.
Key Advantage
OpenAI-Compatible API: Thanks to the OpenAI-compatible endpoint provided by KServe, you can use existing OpenAI SDKs and various tools without any modifications.
2. Preparing the Test Environment: Deploying Kubeflow Jupyter Notebook
To verify the operation of the model deployed with KServe, we will first prepare an API call environment. By using DIP's Kubeflow Catalog, you can easily configure a Jupyter Notebook environment without complex settings.
2.1 Creating a Jupyter Notebook Environment
Step 1: Access DIP and Select a Project
- Log in to PAASUP DIP with a manager account.
- Select the target project from the project list.
- Go to the Create Catalog menu.
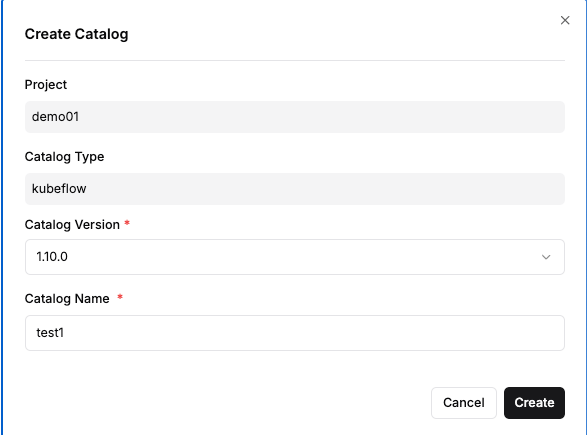
Step 2: Creating the Kubeflow Catalog
- Select Kubeflow from the Create Catalog menu.
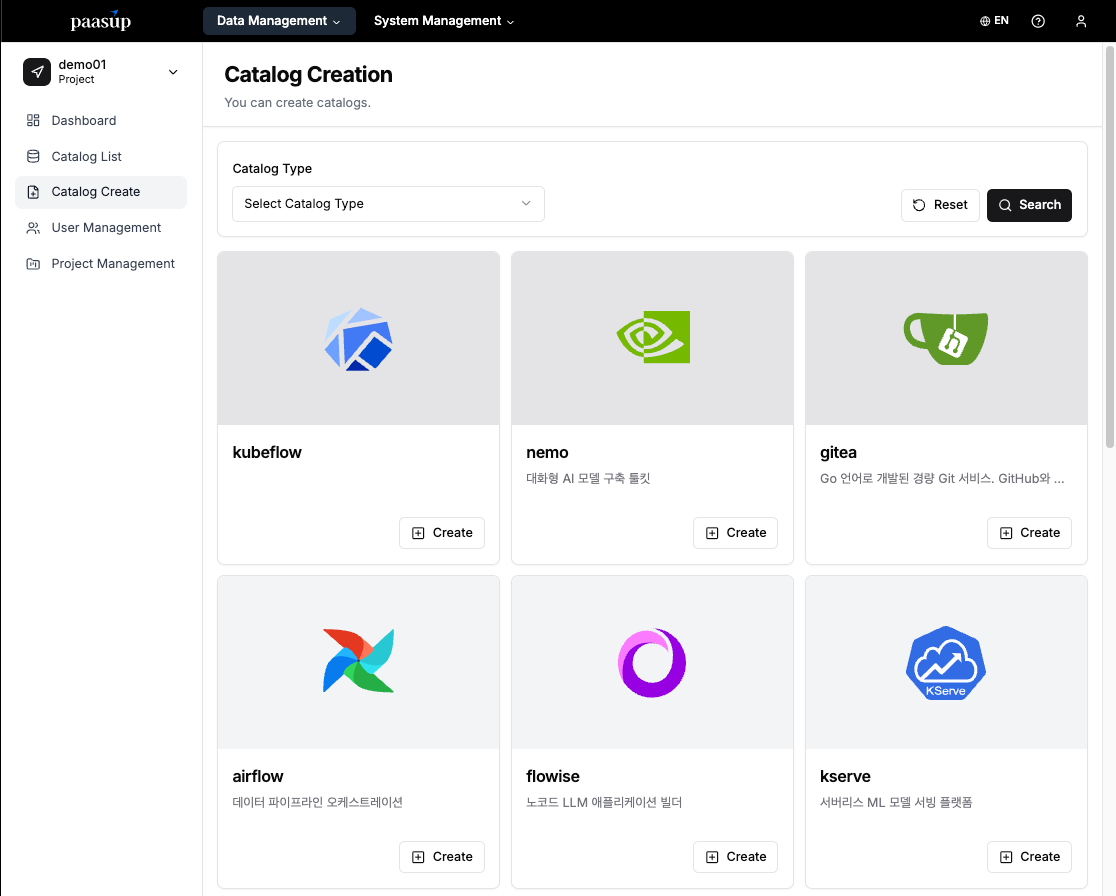
- Enter a catalog version and a distinguishable name.
- Click the "Create" button.
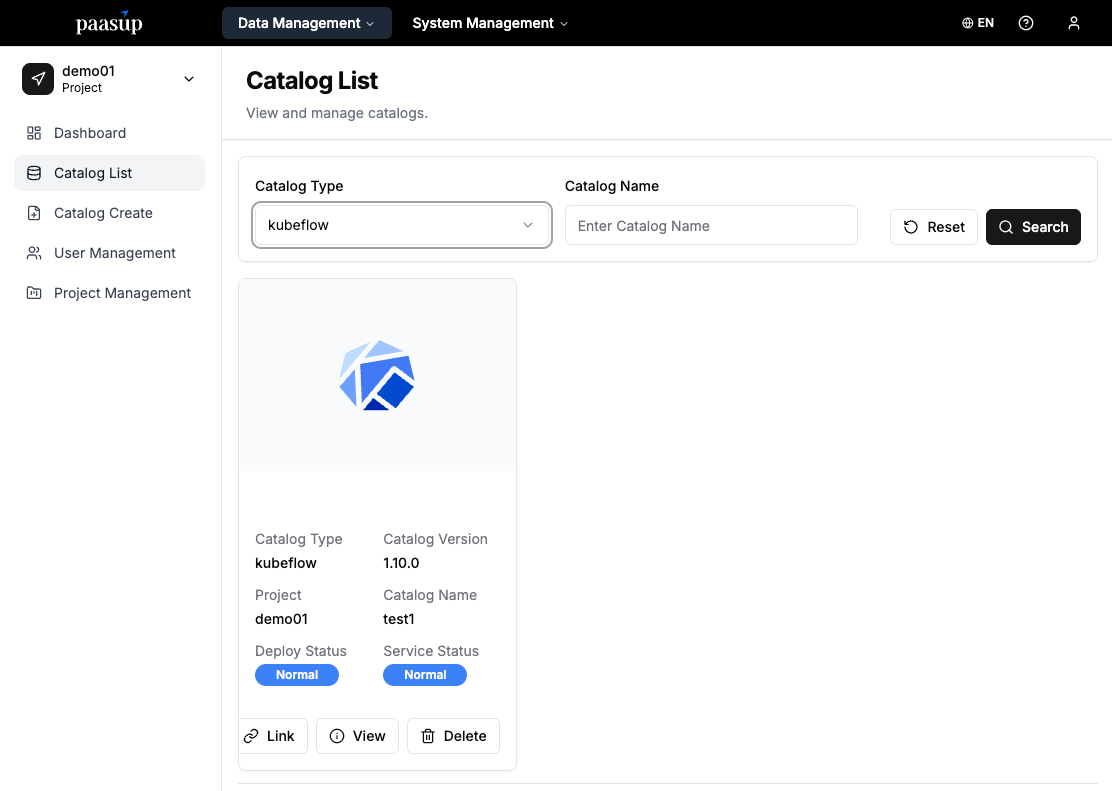
Step 3: Checking the Catalog Status
- Monitor the status on the catalog list page until the deployment is complete.
- Wait until the "Deployment Status" and "Service Status" change to Normal.\
Step 4: Creating a Jupyter Notebook Instance
- Click the deployed Kubeflow service link to access the dashboard.
- Create a new notebook instance in the Notebooks menu.
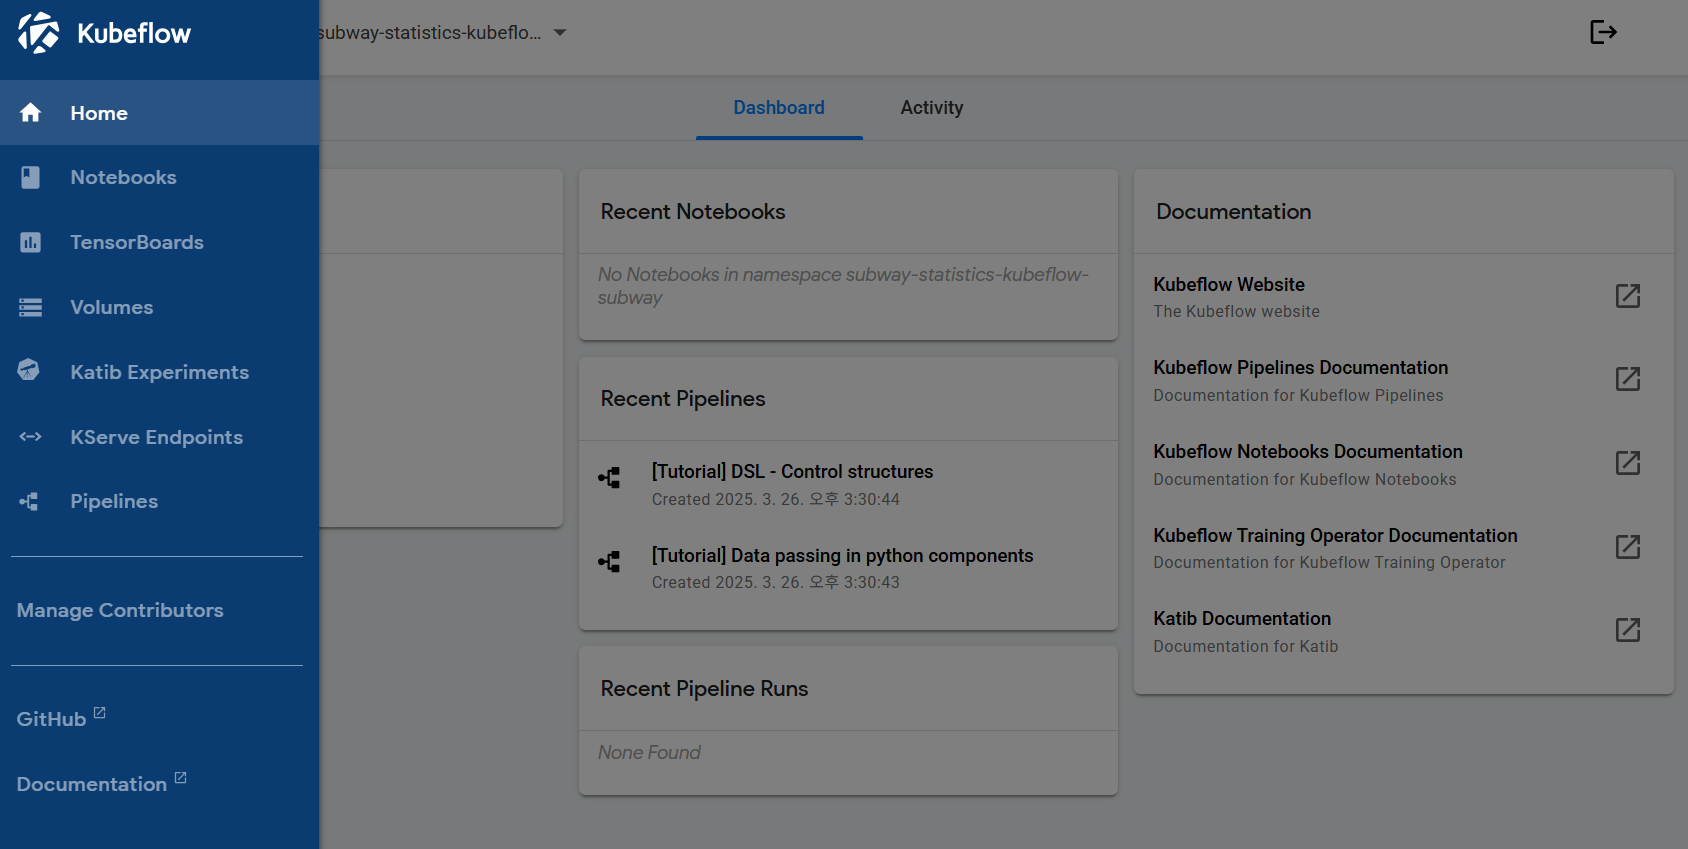

- After creation, the environment is ready for access by clicking the Connect button.
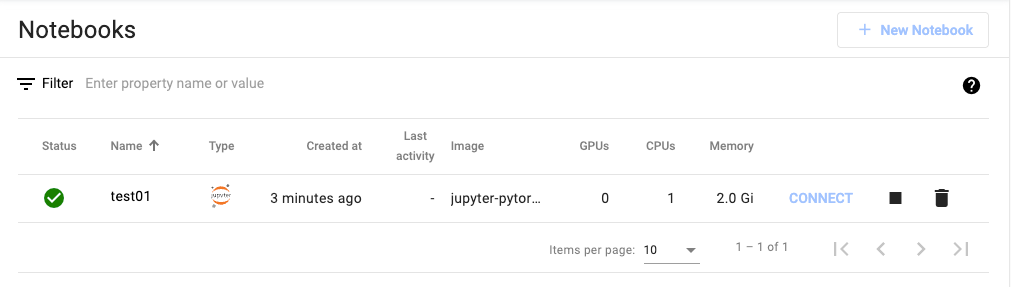
※ Note: This Notebook is used for API testing after KServe deployment is complete.
3. Deploying KServe
3.1 KServe Architecture Overview
KServe is a Kubernetes-native model serving platform that supports various inference backends. PAASUP DIP uses vLLM as the default backend for LLM serving.
Advantages of the vLLM Backend:
- Memory Efficiency: Optimizes memory usage with PagedAttention technology.
- High Throughput: Efficiently handles multiple requests with dynamic batching.
- OpenAI Compatibility: Provides a consistent interface with the standard OpenAI API format.
3.2 Creating the KServe Catalog
Step 1: Selecting the Catalog
- Select the KServe catalog from the Create Catalog menu.
- Click the 'Create' button.
Step 2: Entering Basic Information
- Catalog Version: Select the version.
- Catalog Name: Enter a distinguishable name (e.g.,
llama32-serving). - Query successful
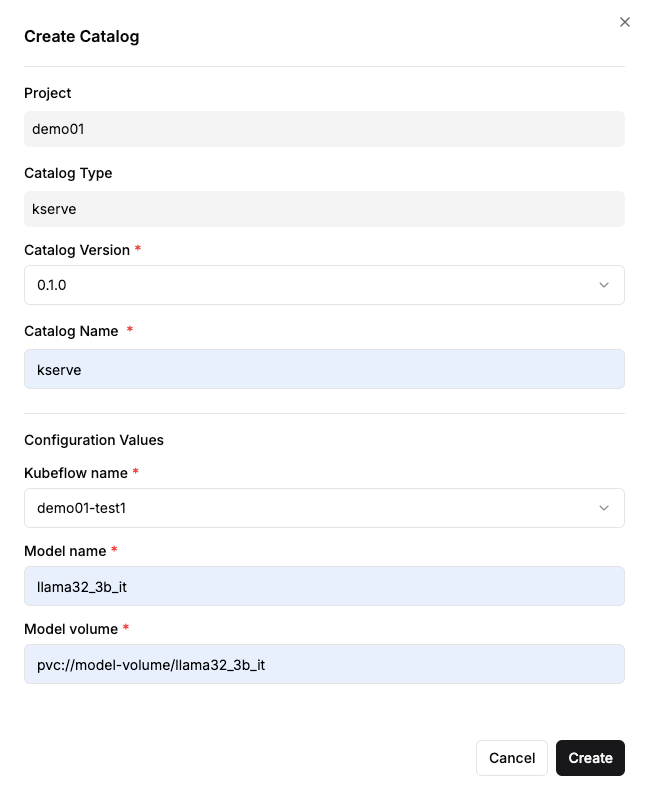
Step 3: Configuring Model Serving Enter the following required values:
- Kubeflow name: Select the Kubeflow instance created earlier.
- Model name: Specify the model name to be served (e.g.,
llama32_3b_it).- This value will be used as the
modelparameter in API calls later.
- This value will be used as the
- Model volume: Specify the path where the model is stored (e.g.,
pvc://model-volume/llama32_3b_it).- The model files must be pre-uploaded to this path.
3.3 Checking Deployment Status
After creating the catalog, monitor the deployment progress.
- Check the created KServe catalog in the catalog list.
- Wait until the "Deployment Status" and "Service Status" change to Normal.

4. Verifying and Configuring Endpoints
Once KServe is deployed, DIP provides two access methods: an External URL for external cluster access and a Cluster-local URL for internal cluster access.
4.1 Checking KServe Endpoint Information
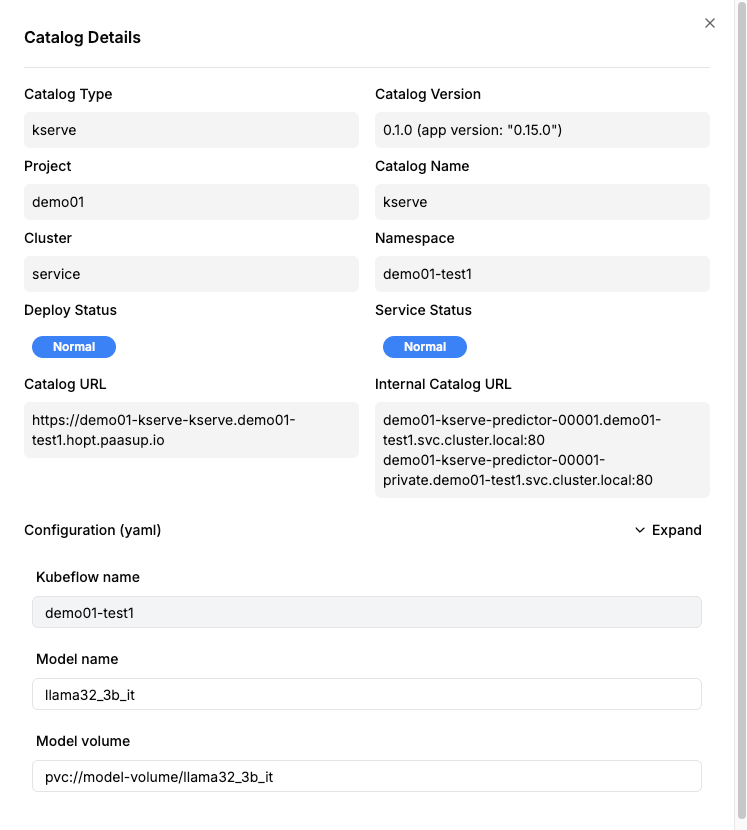
Method 1: Check in DIP Catalog Details
- Access the KServe catalog details page.
- Check the Catalog Address or Internal Catalog Address.
- Example URLs:
- External access:
https://demo01-kserve-kserve.demo01-test1.hopt.paasup.io - Internal access:
http://demo01-kserve-predictor-00001.demo01-test1.svc.cluster.local:80
- External access:
- Example URLs:
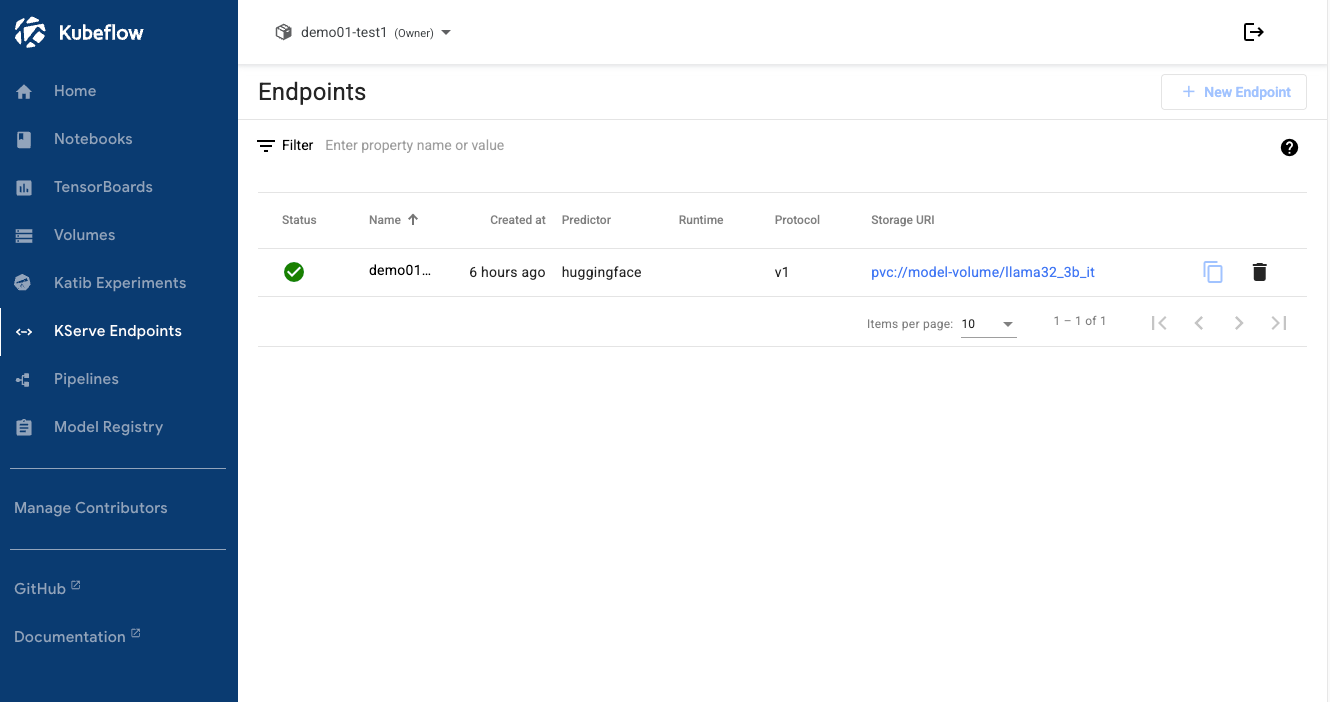
Method 2: Check in Kubeflow Dashboard
- Kubeflow Dashboard → KServe menu.
- Check the URL internal of the deployed model.
- Internal cluster access:
http://demo01-kserve.demo01-test1.svc.cluster.local
- Internal cluster access:

※ Note:
All endpoints provide the same OpenAI-compatible API (/openai/v1), so you can choose the URL that is accessible based on your network environment or proxy settings.
5. Inference Testing with Jupyter Notebook
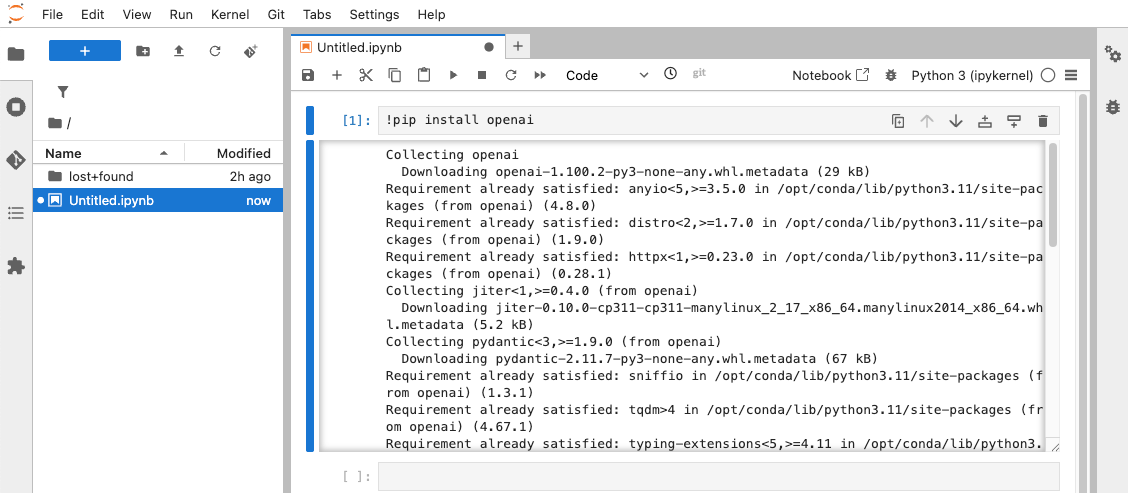
5.1 Accessing JupyterLab
- Click the Connect button of the Jupyter Notebook instance you created earlier.
- After accessing the JupyterLab environment, create a new Python notebook.
- Install the necessary library:
!pip install openai
5.2 Inference Testing via OpenAI-Compatible API
One of the biggest advantages of KServe is that it provides an endpoint compatible with the OpenAI API. This allows you to use widely-used client code, such as the openai library, without any modifications.
- Example Code:
from openai import OpenAI

# Set up the KServe endpoint
# For external cluster access (HTTPS):
# base_url="https://demo01-kserve-kserve.demo01-test1.hopt.paasup.io/openai/v1"
# For internal cluster access:
base_url = "http://demo01-kserve-predictor-00001.demo01-test1.svc.cluster.local:80/openai/v1"

client = OpenAI(
    base_url = base_url,
    api_key = "dummy-key"     # Use a dummy value if authentication is disabled
)

# Compose messages to send to the LLM
messages = [
    {"role": "system", "content": "Please answer concisely and clearly."},
    {"role": "user", "content": "Express the area of a circle with a diameter of 10 in terms of π."}
]

# Generate a response
completion = client.chat.completions.create(
  model="llama32_3b_it",   # Model name
  messages=messages,
  temperature=0.5,
  top_p=1,
  max_tokens=1024,
  stream=True              # Enable streaming to receive responses in real-time
)

# Print the response
for chunk in completion:
  if chunk.choices[0].delta.content is not None:
    print(chunk.choices[0].delta.content, end="")
6. Building a Web Interface with OpenWebUI
OpenWebUI is an open-source web interface that provides a ChatGPT-like user experience (UX), making it easy for non-developers to use LLMs.
6.1 Deploying the OpenWebUI Catalog
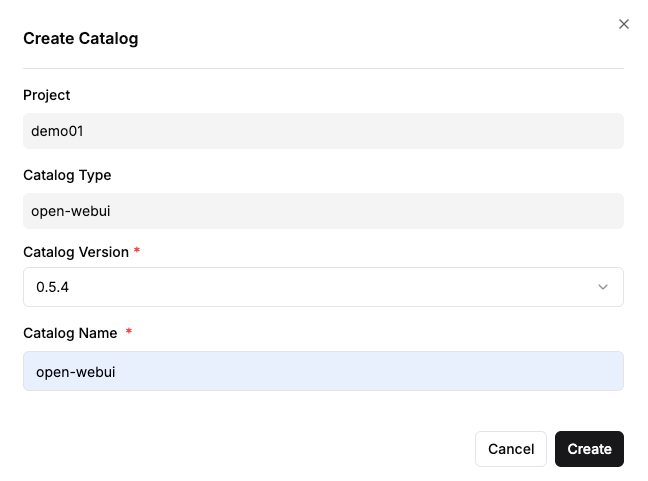
Step 1: Creating the OpenWebUI Catalog
- From the Create Catalog menu, select OpenWebUI.
- Enter the version and a name, then click "Create"
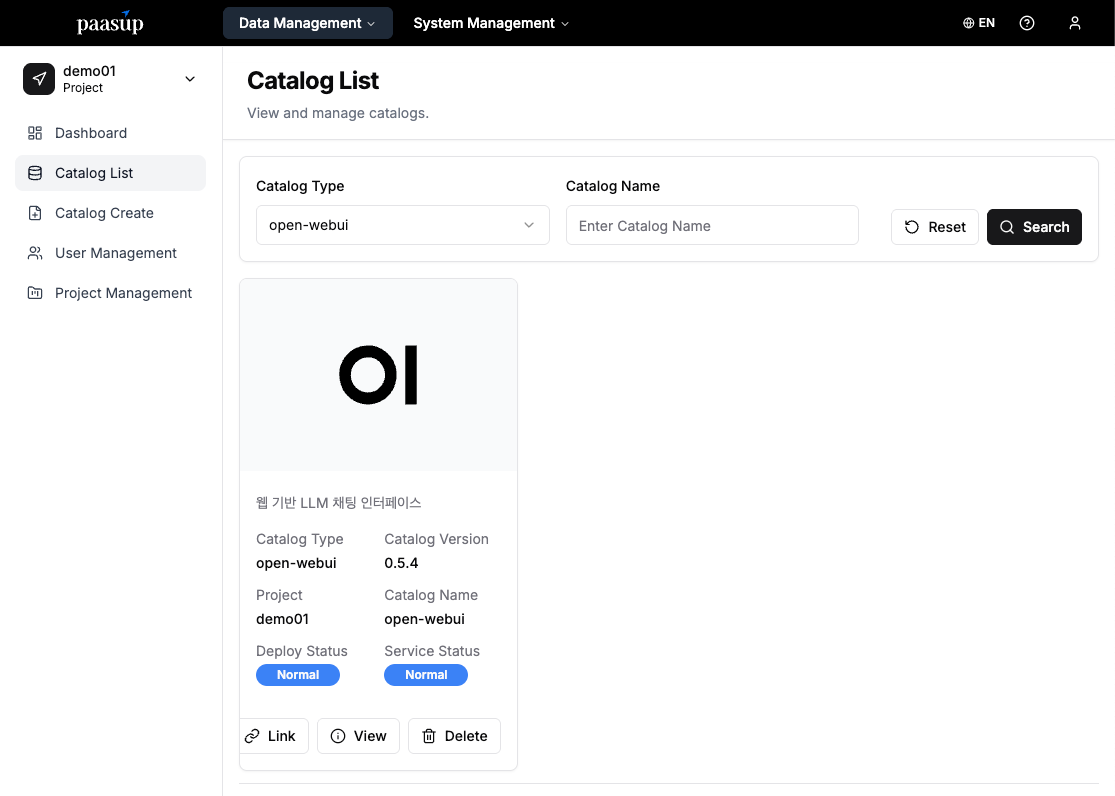
Step 2: Checking Deployment Status
- Wait until the catalog's "Deployment Status" and "Service Status" change to Normal.
6.2 OpenWebUI Initial Setup
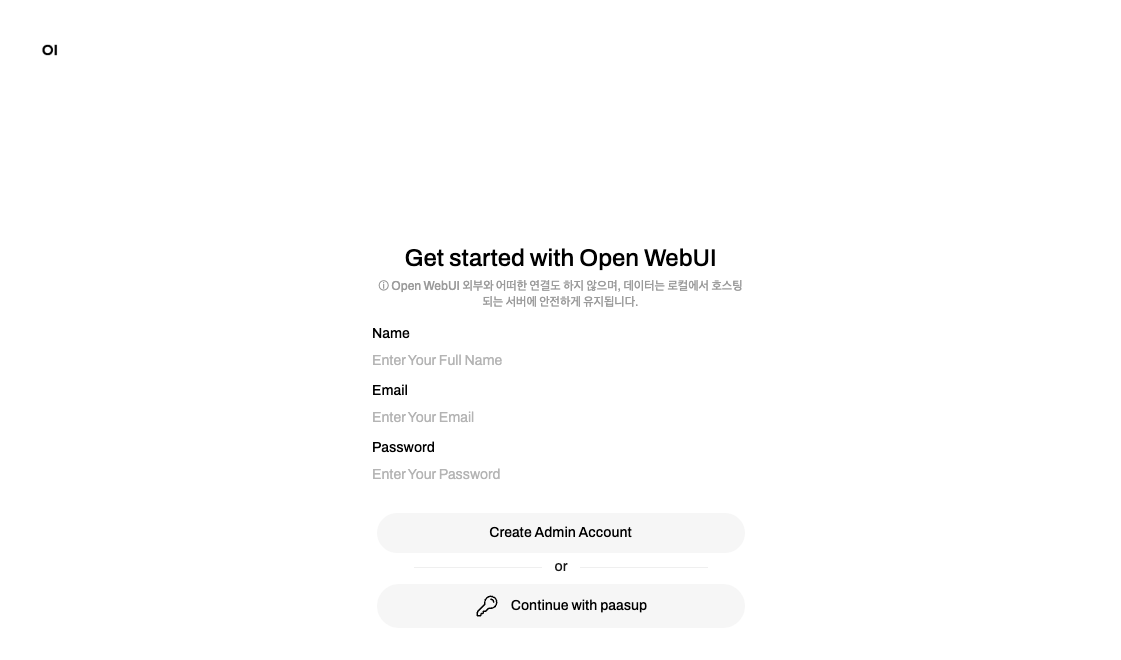
Step 1: First Access and Account Creation
- Access the OpenWebUI service link.
- The first time you access it, a screen for creating an administrator account will appear.
- Set a name, email address, and password to create the administrator account.
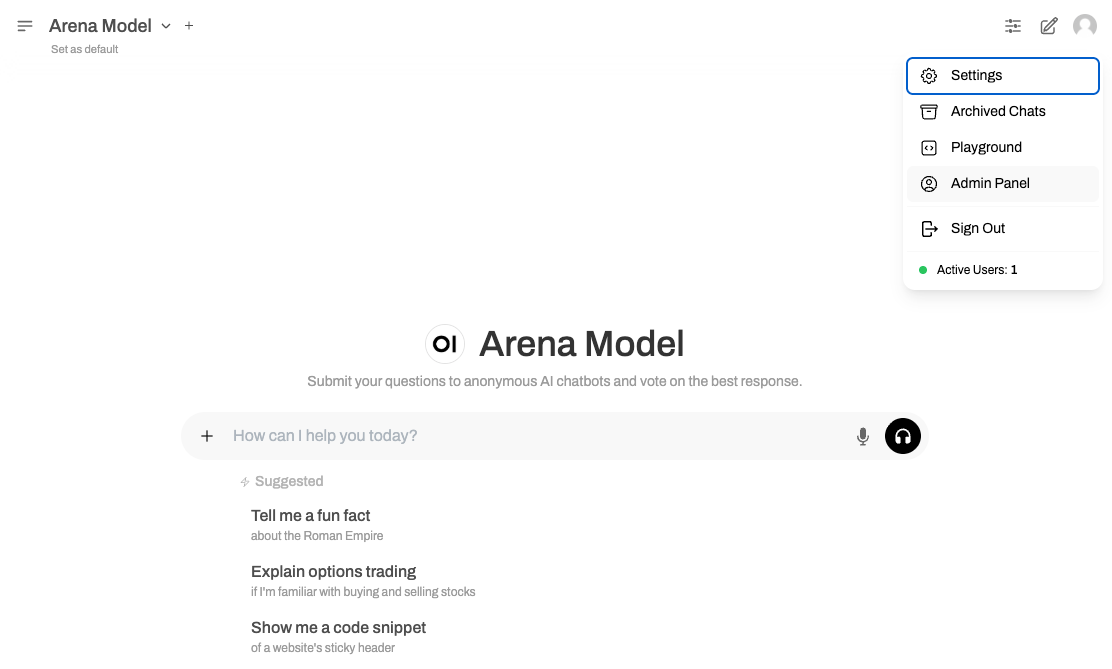
Step 2: Accessing the Admin Panel
- Click the user profile icon in the top right corner.
- Select the Admin Panel menu.
6.3 Configuring KServe Endpoint Connection
Step 1: Accessing the Connection Settings Menu
- From the top Settings tab, select Connections from the left-hand menu.
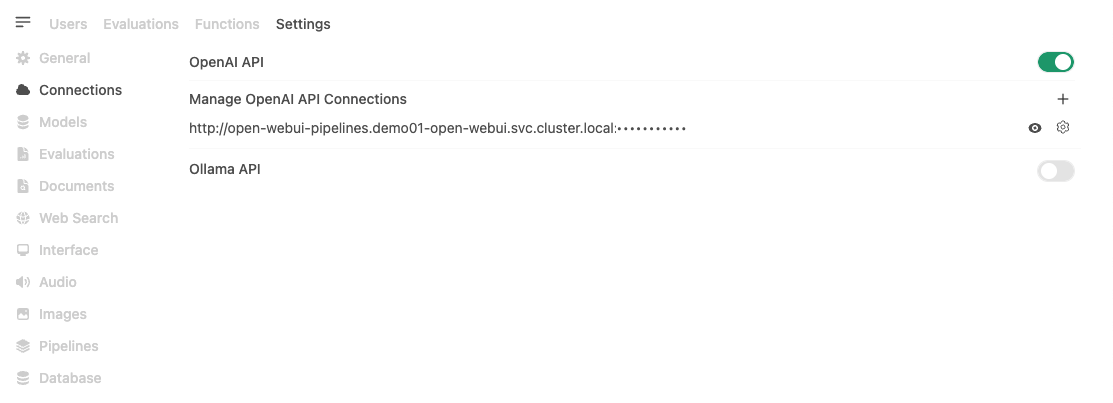
Step 2: Adding an OpenAI API Connection
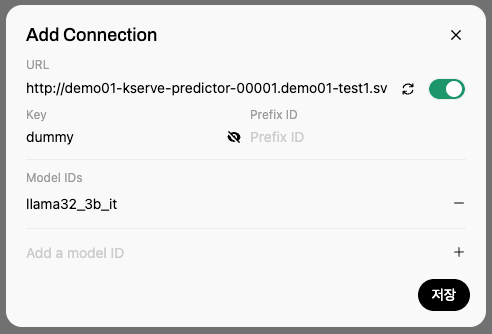
- Click the '+' button in the OpenAI API section.
- Enter the connection information:
- URL:
{KServe endpoint}/openai/v1- External access:
https://demo01-kserve-kserve.demo01-test1.hopt.paasup.io/openai/v1 - Internal access:
http://demo01-kserve-predictor-00001.demo01-test1.svc.cluster.local:80/openai/v1 - Internal access:
http://demo01-kserve.demo01-test1.svc.cluster.local/openai/v1
- External access:
- API Key:
dummy-key(Enter any value in an environment with authentication disabled) - Model: The model name set during KServe deployment (e.g.,
llama32_3b_it)
- URL:
- Click the Save button to complete the setup.
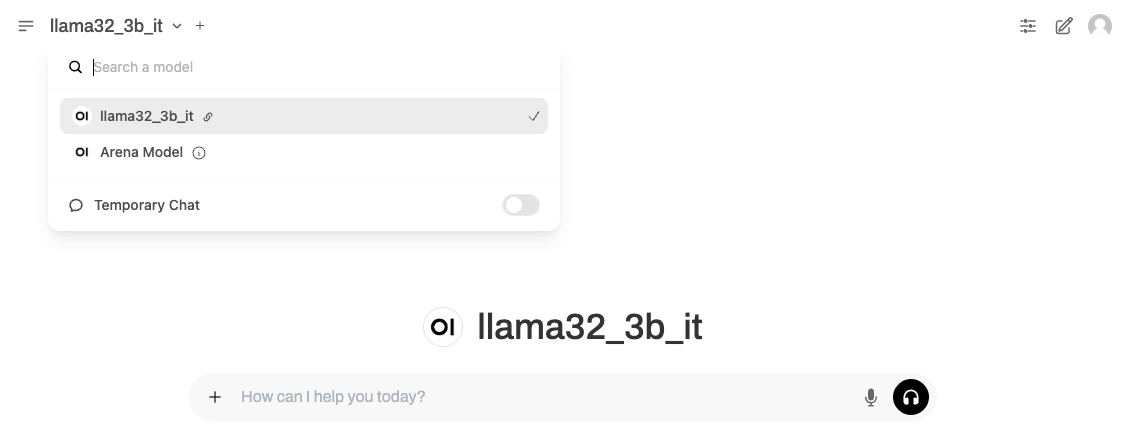
6.4 Testing the Model via the Web Interface
Step 1: Selecting the Model
- Select the connected model on the OpenWebUI main screen.
Step 2: Conversation Test
- Enter a question in the chat window to see the response.
Example Input: Find three consecutive even numbers whose sum is 48.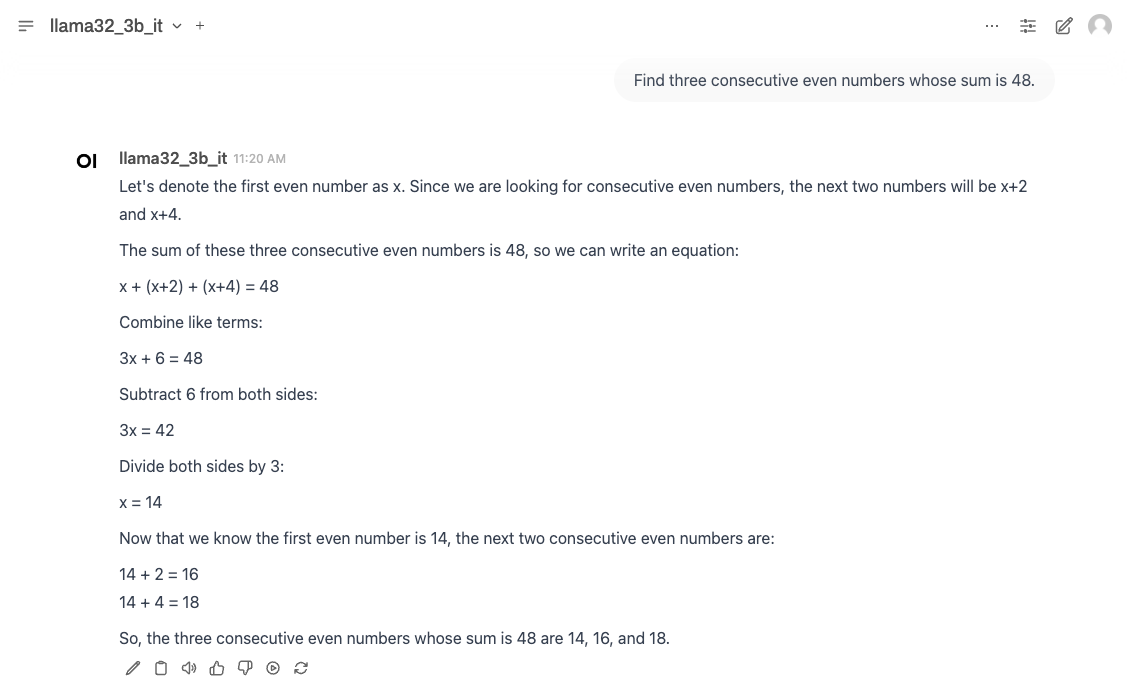
This way, you can instantly build a production-level AI chatbot with features like streaming responses, conversation history management, and multi-user access, all without coding.
7. No-Code AI Workflow with Flowise
Flowise is a tool that allows you to build complex AI workflows without coding, using a visual node-based interface. It is particularly useful for building RAG (Retrieval-Augmented Generation) systems or multi-step AI processes.
7.1 Deploying the Flowise Catalog
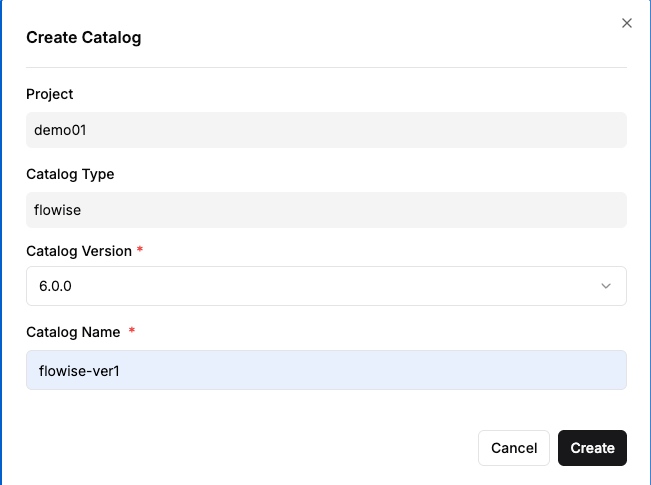
Step 1: Creating the Flowise Catalog
- From the Create Catalog menu, select Flowise.
- Enter the version and a name, then click "Create."
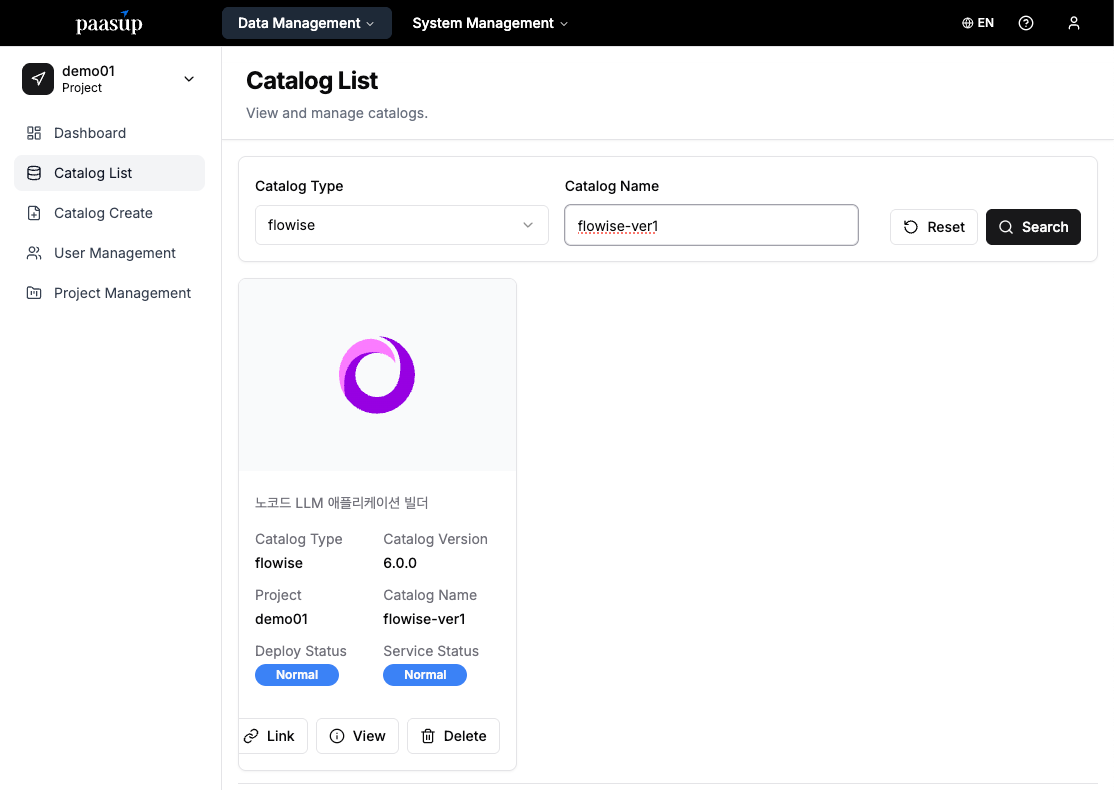
Step 2: Checking Deployment Status
- Wait until the catalog's "Deployment Status" and "Service Status" change to Normal.
7.2 Building a Basic Chatflow
Step 1: Creating a New Chatflow
- From the left-hand Chatflows menu, click the Add New button.

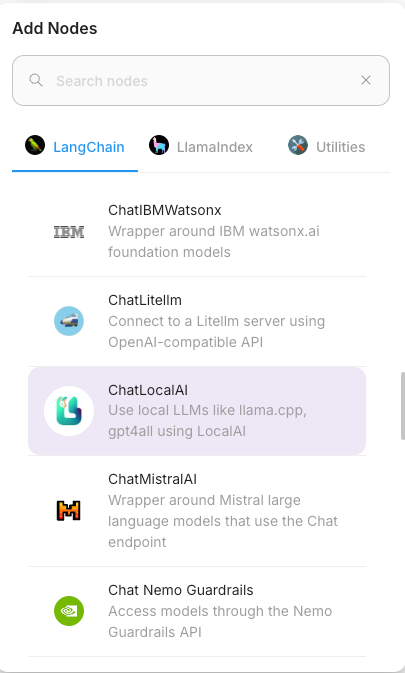
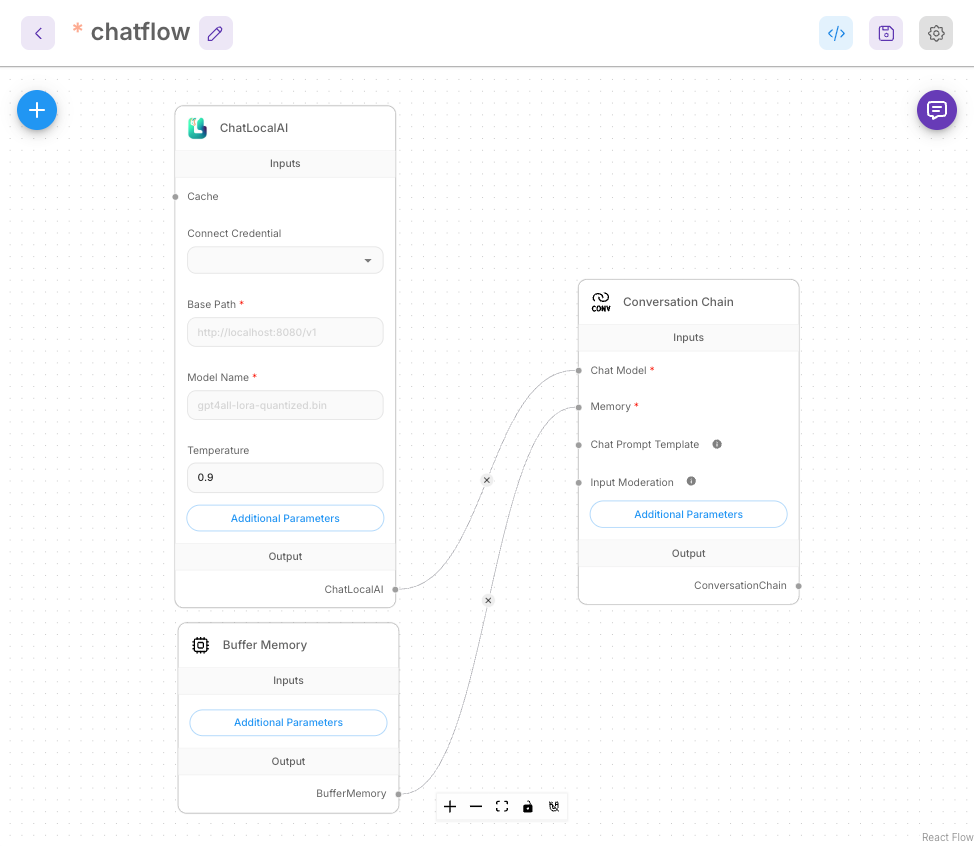
Step 2: Adding Nodes Click the '+' button on the canvas to add the following nodes:
- ChatLocalAI: The core node responsible for connecting to the LLM.
- Buffer Memory: Manages memory to maintain conversation context.
- Conversation Chain: Manages the overall conversation flow.
Step 3: Connecting Nodes Connect the nodes logically using drag and drop:
- ChatLocalAI ↔ Conversation Chain (as the Chat Model)
- Buffer Memory ↔ Conversation Chain (as Memory)
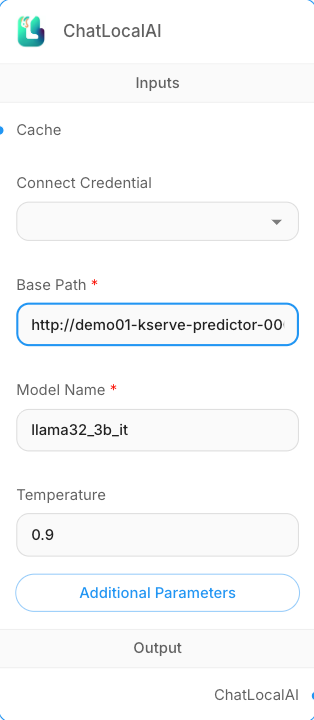
Step 4: Configuring the ChatLocalAI Node
- Base Path:
{KServe endpoint}/openai/v1- External access:
https://demo01-kserve-kserve.demo01-test1.hopt.paasup.io/openai/v1 - Internal access:
http://demo01-kserve-predictor-00001.demo01-test1.svc.cluster.local:80/openai/v1 - Internal access:
http://demo01-kserve.demo01-test1.svc.cluster.local/openai/v1
- External access:
- Model Name: The model name set during KServe deployment (e.g.,
llama32_3b_it)
7.3 Testing and Using the Workflow
Basic Conversation Test:
Example Input:
A train traveled at 60 km/h for 2 hours and then at 90 km/h for 1 hour. What was the average speed of the train?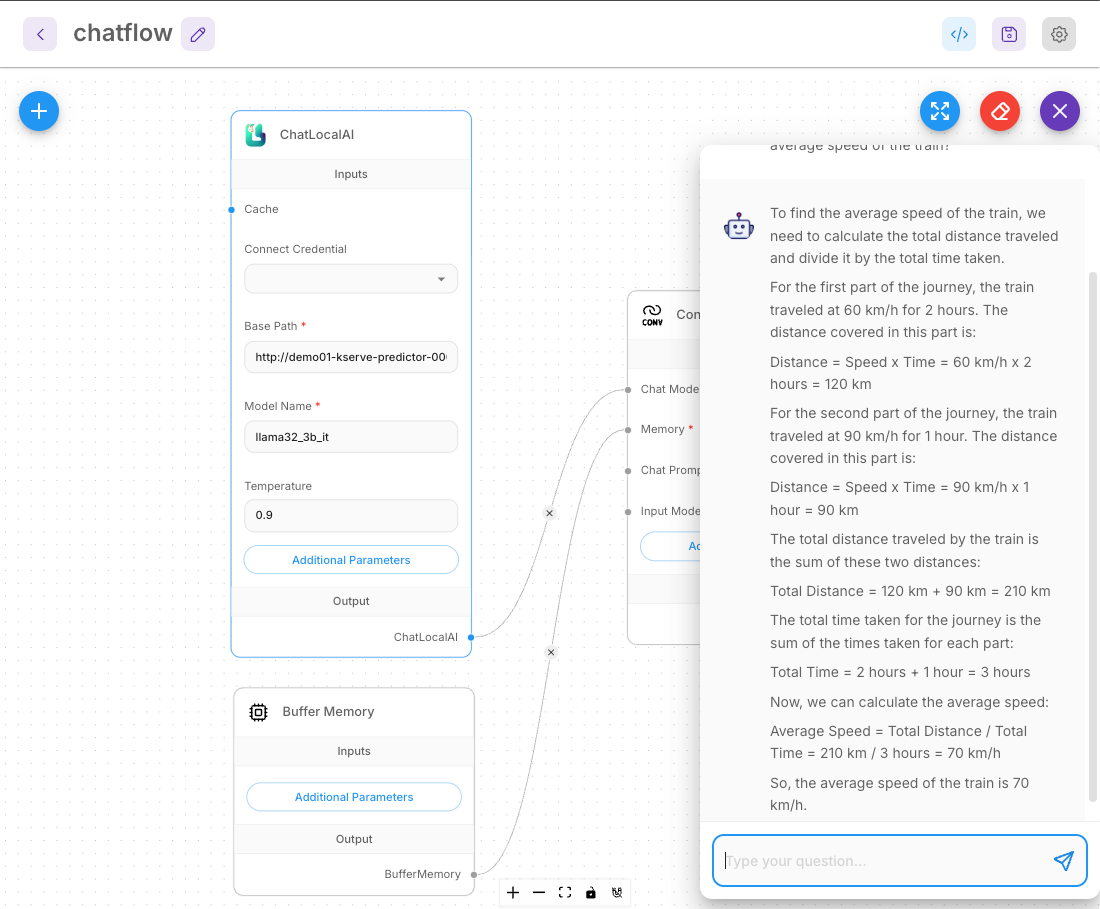
8. Conclusion
By using PAASUP DIP, you can quickly build enterprise-grade LLM services without the burden of complex Kubernetes configurations or MLOps pipeline construction.
Features by Access Method
| Interface | Advantages | Suitable Users/Use Cases |
| Jupyter Notebook | - Granular control via programming<br>- Direct API calls and customization<br>- Automation possible | - Developers<br>- Data Scientists |
| OpenWebUI | - ChatGPT-style UX<br>- Multi-user support | - General users<br>- Team AI chatbots |
| Flowise | - Drag-and-drop interface<br>- No-code workflow<br>- RAG/multi-step process configuration | - Non-developers<br>- Business automation |
Usage Tips
- Optimize Model Performance: After deployment, adjust hyperparameters such as
temperatureandtop_pto find the best response quality. - Monitor Resources: Use DIP's monitoring features to continuously check CPU and memory usage.
- Use Autoscaling: When traffic increases, you can enable KServe's autoscaling feature to automatically adjust the number of pods based on demand.
The PAASUP DIP catalog system allows you to efficiently build and operate LLM services tailored to your organization. We hope this guide serves as a great starting point for your AI projects.