
Fine-Tuning and Evaluation of LLMs with NeMo Microservices: A Practical Tutorial
In this guide, we cover a hands-on workflow that leverages NVIDIA NeMo Microservices in the PAASUP DIP environment to fine-tune the llama-3.2-3b-instruct model with KoAlpaca data using LoRA, and directly compare performance before and after tuning.
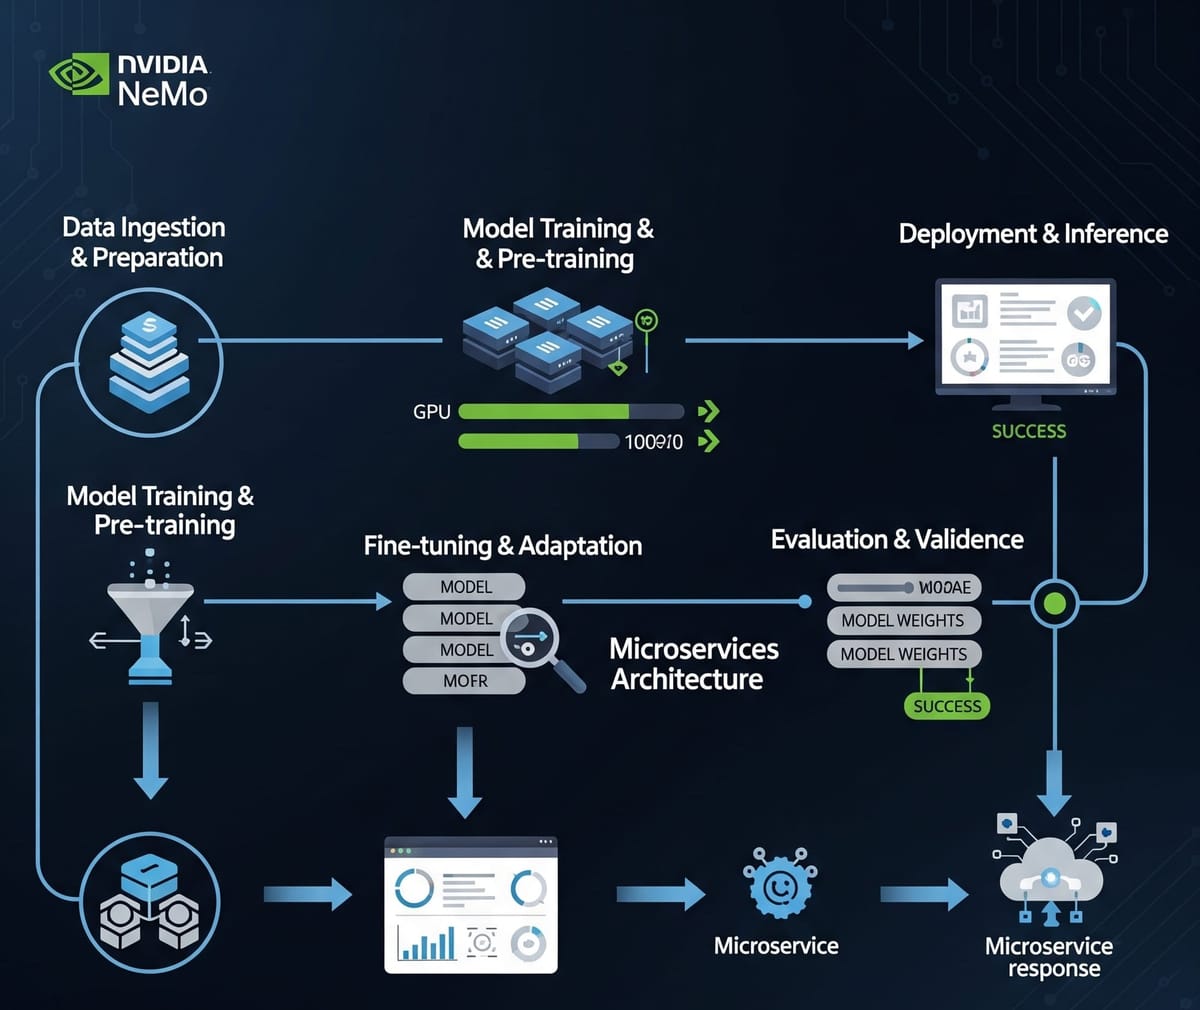
Table of Contents
- Introduction
- DIP Environment Setup Guide
- Preparing the Dataset
- Configuring NeMo Environment and Namespace
- Uploading Data and Registering with Entity Store
- Running LoRA Fine-Tuning
- Deploying the Custom Model for Inference
- Inference Testing (Base vs Custom)
- Performance Evaluation and Analysis
- Conclusion
1. Introduction
In Part 1, we introduced the core components of the NVIDIA NeMo platform—NeMo Framework and NeMo Microservices—and their differences. In Part 2, we walked through how to fine-tune large language models (LLMs) with NeMo Framework and evaluate their performance.
In this third part, we demonstrate how to leverage NVIDIA NeMo Microservices in the PAASUP DIP(Data Intelligence Platform) environment to fine-tune the llama-3.2-3b-instruct model with the KoAlpaca dataset using LoRA (Low-Rank Adaptation). We then compare and analyze the quality of responses before and after fine-tuning (Base vs Custom).
- Base model: meta/llama-3.2-3b-instruct
- Training dataset: beomi/KoAlpaca-v1.1a
- Fine-tuning method: LoRA (Low-Rank Adaptation)
- Goal: Improve performance through Korean instruction tuning
This project is conducted in the PAASUP DIP environment using pre-built NeMo Microservices and Kubeflow environments.
2. DIP Environment Setup Guide
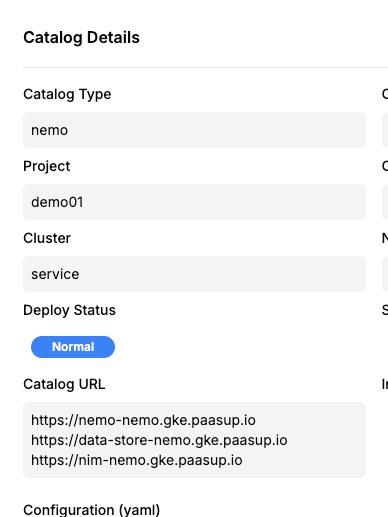
In PAASUP DIP, you can easily provision a development environment powered by NeMo Microservices and Kubeflow simply by creating a catalog.
[Step 1] Log in and Select Project
- Goal: Access the environment with a pre-created project and manager account.
- Method: Log in with manager account → Check project list → Select "Create Catalog"
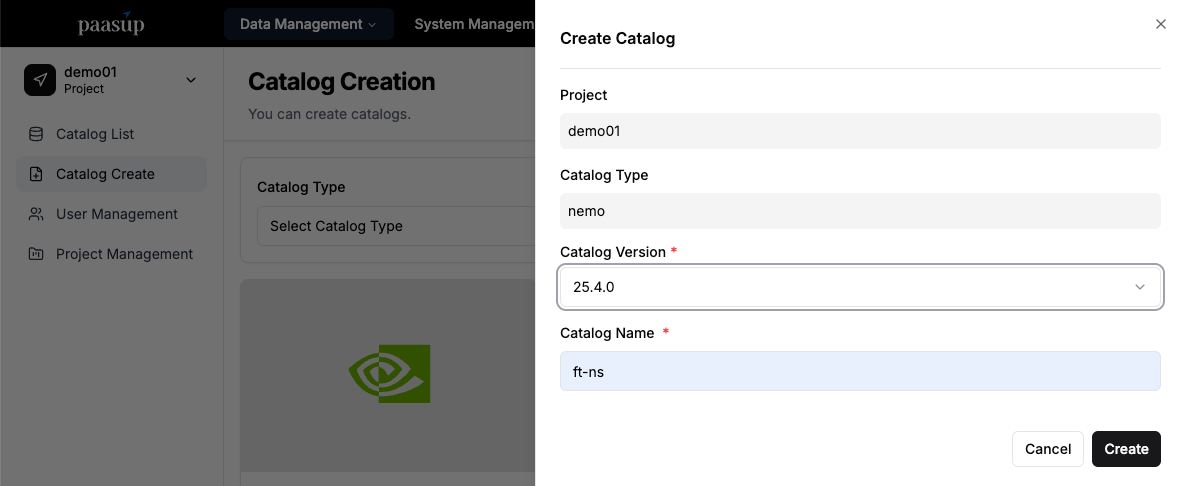
[Step 2] Create NeMo Catalog
- Goal: Create a project-specific NeMo Microservices namespace (NS) and prepare for integration.
- Method: "Create Catalog" → Select nemo → Enter version and name → Click "Create"
- The namespace is created as
ProjectName-CatalogName.- Example: Project name =
KoAlpaca, catalog name =ft-ns→ namespace =KoAlpaca-ft-ns
- Example: Project name =
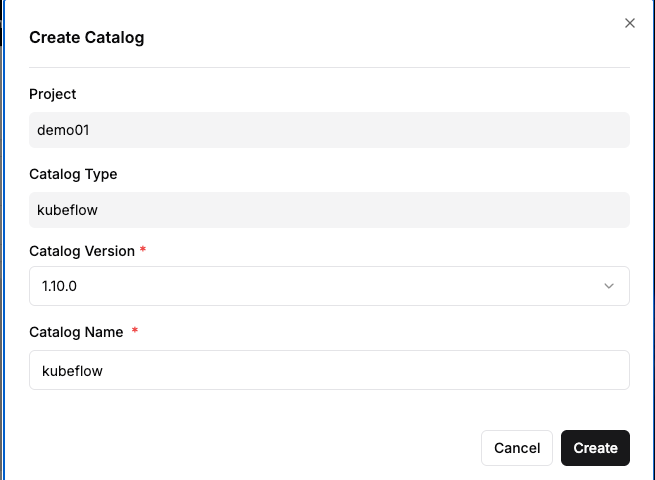
[Step 3] Create Kubeflow Catalog
- Goal: Create a Kubeflow environment to run Jupyter Notebook.
- Method: "Create Catalog" → Select Kubeflow → Enter version and name → Click "Create"
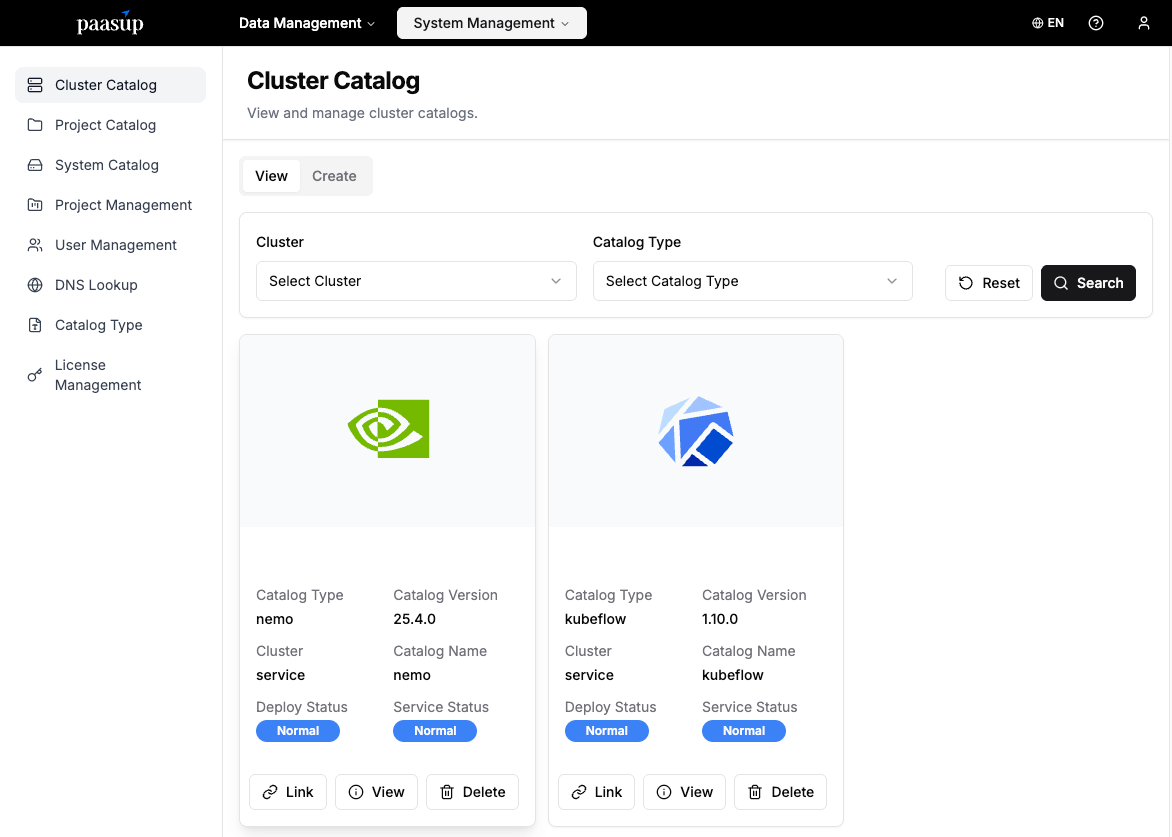
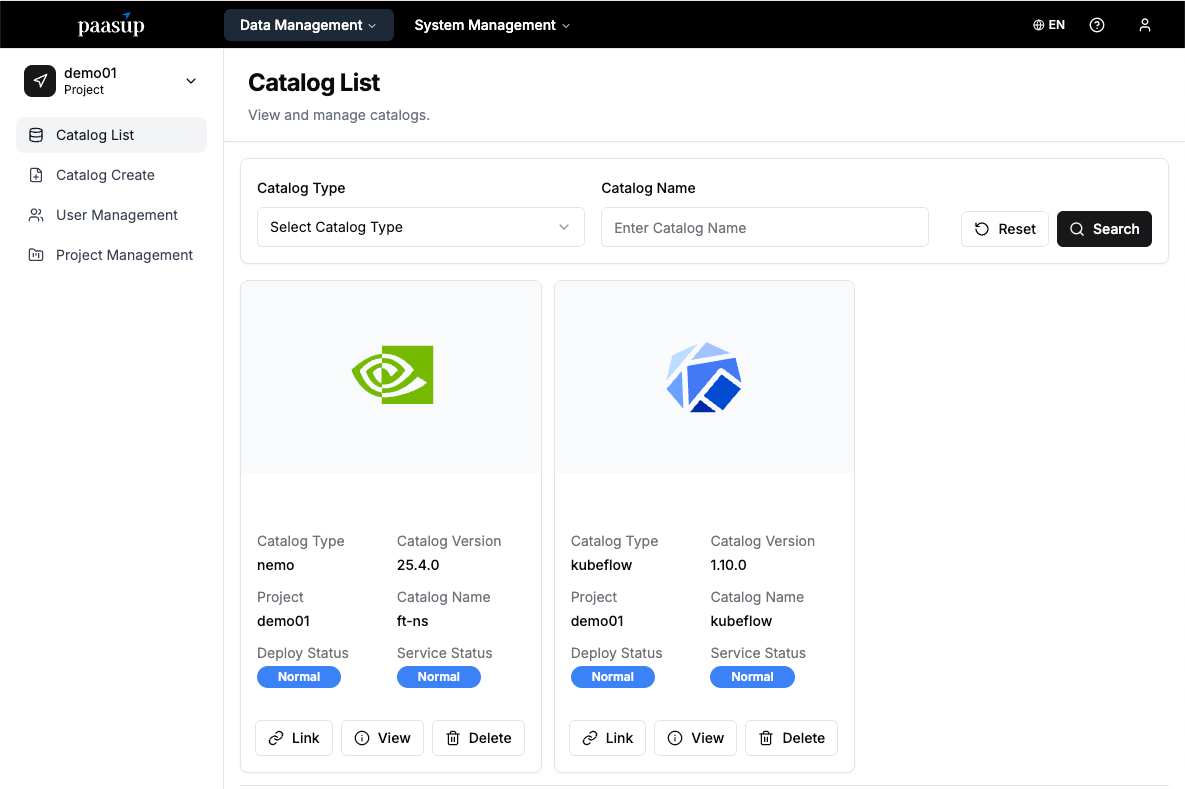
[Step 4] Check Catalog Status
- Goal: Verify deployment and service status of the created catalogs.
- Method: Monitor status on the catalog view screen.
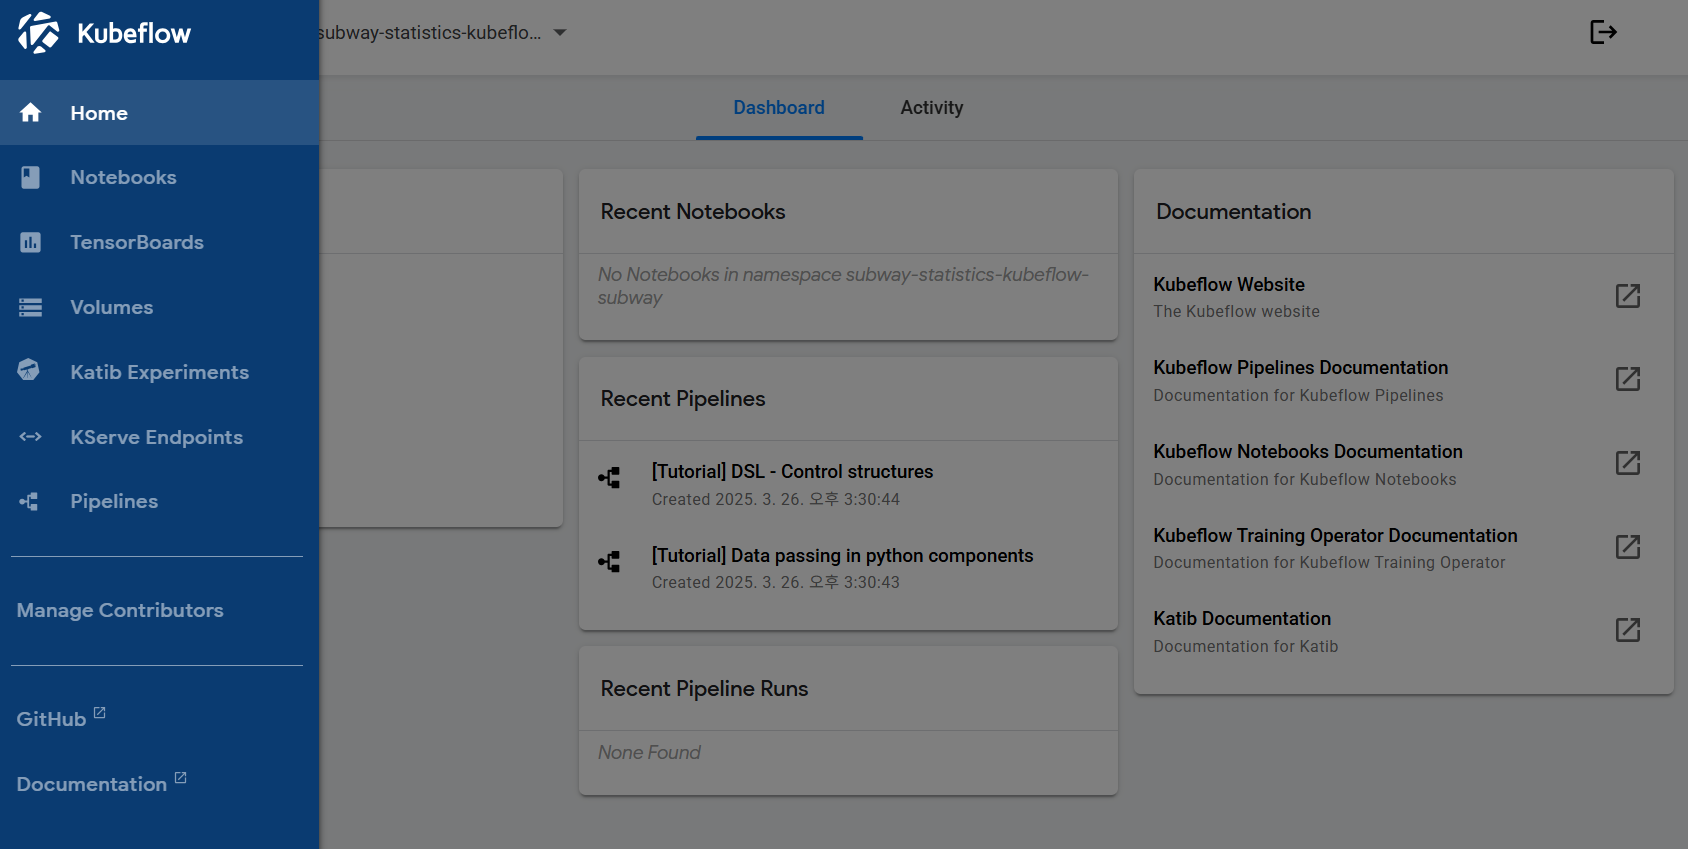
[Step 5] Launch Jupyter Notebook
- Goal: Prepare a Python execution environment.
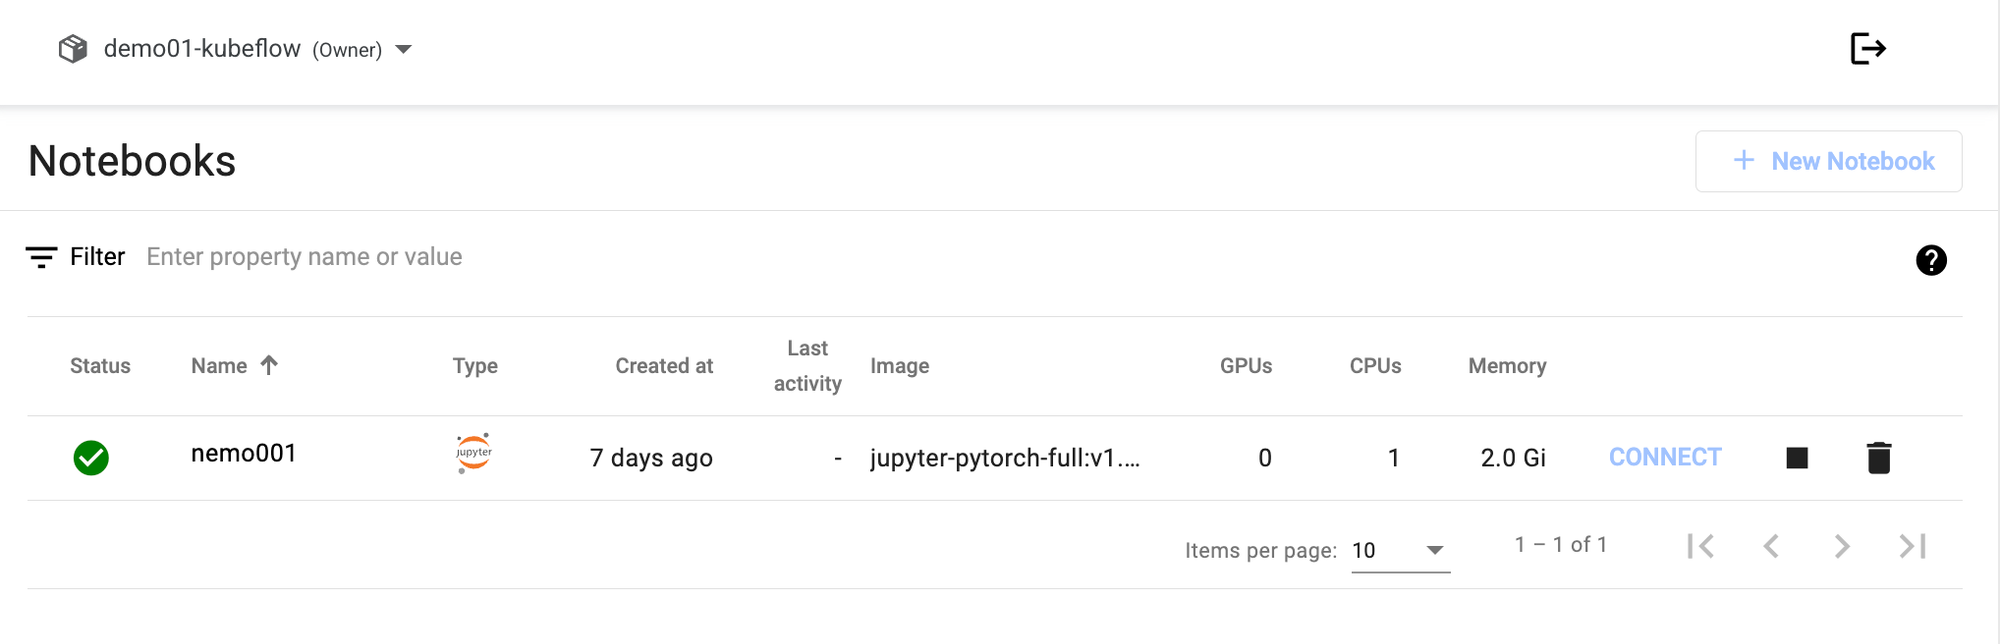
- Method: Click Kubeflow service link → Create Notebook instance.

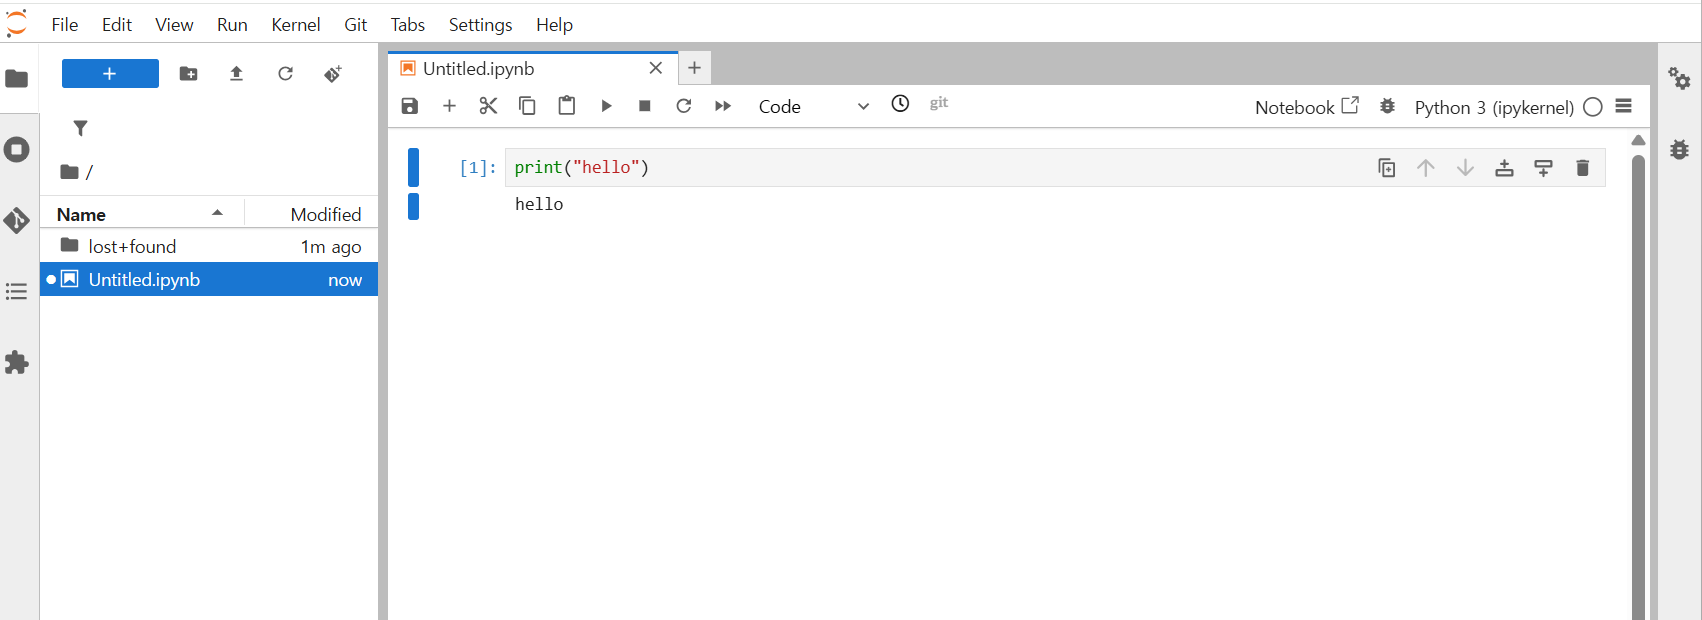
[Step 6] Access the Development Environment
- Goal: Connect to the created Notebook and start coding.
- Method: Click "Connect" → Open JupyterLab.
- Note:
- When you create a NIM catalog in PAASUP DIP, you can also deploy inference services.
- Fine-tuning requires 1 GPU, and NIM deployment also requires 1 GPU.
- In this tutorial, we’ll complete fine-tuning first and then deploy with NIM so the entire workflow runs on a single GPU (sequentially).
3. Preparing the Dataset
To run fine-tuning, the dataset must be converted into the format required by NeMo Microservices. In this tutorial, we use beomi/KoAlpaca-v1.1a as an example. Other Korean datasets can also be adapted by applying the same transformation.
3.1 NeMo Microservices Data Format
NeMo Microservices requires chat models to use the messages JSONL format.
Each entry must include the role and content of the conversation.
Example format:
{
  "messages": [
    {"role": "system", "content": "<system message>"},
    {"role": "user", "content": "<user message>"},
    {"role": "assistant", "content": "<assistant response>"}
  ]
}
3.2 KoAlpaca Data Conversion
Original KoAlpaca-v1.1a structure
{
  "instruction": "What is the capital of Korea?",
  "output": "The capital of Korea is Seoul.",
  "url": "..."  // not needed for training
}
Converted structure
{
  "messages": [
    {"role": "user", "content": "What is the capital of Korea?"},
    {"role": "assistant", "content": "The capital of Korea is Seoul."}
  ]
}
3.3 Step-by-Step Implementation
Step 0: Configure the Environment
In config.py, specify service URLs, tokens, dataset name, and base model info.NDS_URL, NEMO_URL, and NIM_URL can be found in the catalog details of the deployed NeMo instance.
# (Required) NeMo Microservices URLs
NDS_URL = "https://data-store-nemo.gke.paasup.io"  # Data Store
NEMO_URL = "https://nemo-nemo.gke.paasup.io"       # Customizer, Entity Store, Evaluator, Guardrails
NIM_URL = "https://nim-nemo.gke.paasup.io"         # NIM

# (Required) Hugging Face Token
HF_TOKEN = "your_hf_token"

# (Optional) For WandB logging
WANDB_API_KEY = ""

# (Optional) NeMo Data Store token if configured
NDS_TOKEN = "token"

# (Optional) Namespace and dataset name
NMS_NAMESPACE = "KoAlpaca-ft-ns"
DATASET_NAME = "KoAlpaca-v1.1a"

# (Optional) Base model (must be supported by the Customizer deployment!)
BASE_MODEL = "meta/llama-3.2-3b-instruct"
BASE_MODEL_VERSION = "v1.0.0+A100"
- Note:
- You must generate an
HF_TOKENfrom Hugging Face Hub.
- You must generate an
Step 1: Download the Dataset
Install dependencies and load KoAlpaca from Hugging Face:
!pip install huggingface_hub datasets jinja2>=3.1.0 openai nemo-microservices
import os, json
from pprint import pprint
from datasets import load_dataset
from config import HF_TOKEN

# Environment variables
os.environ["HF_TOKEN"] = HF_TOKEN
os.environ["HF_ENDPOINT"] = "https://huggingface.co"

dataset = load_dataset("beomi/KoAlpaca-v1.1a")
pprint(example)
Step 2: Convert and Preprocess
Transform KoAlpaca into the messages JSONL format:
def convert_to_messages(example):
    instruction = example.get("instruction", "").strip()
    output_text = example.get("output", "").strip()
    if not instruction or not output_text:
        return None
    return {
        "messages": [
            {"role": "user", "content": instruction},
            {"role": "assistant", "content": output_text}
        ]
    }
Save as JSONL:
def save_jsonl(data, path):
    os.makedirs(os.path.dirname(path), exist_ok=True)
    with open(path, "w", encoding="utf-8") as f:
        for item in data:
            if item:
                f.write(json.dumps(item, ensure_ascii=False) + "\n")
    print(f"✅ Saved: {path}")
Split the dataset and save the training, validation, and evaluation sets:
split_dataset = dataset.train_test_split(test_size=0.05, seed=42)
train_set, val_set = split_dataset["train"], split_dataset["test"]

save_jsonl(map(convert_to_messages, train_set), "./data/customization/training.jsonl")
save_jsonl(map(convert_to_messages, val_set), "./data/validation/validation.jsonl")
save_jsonl(map(convert_to_messages, val_set), "./data/evaluation/evaluation.jsonl")
3.4 Examples with Other Korean Datasets
nlpai-lab/kullm-v2
- Structure: instruction + input + output
- Combine instruction and input when converting.
dataset = load_dataset("nlpai-lab/kullm-v2")

def convert_to_messages(example):
    instruction = example.get("instruction", "").strip()
    input_text = example.get("input", "").strip()
    output_text = example.get("output", "").strip()
    if not output_text:
        return None
    prompt = instruction if not input_text else f"{instruction}\n\n{input_text}"
    return {
        "messages": [
            {"role": "user", "content": prompt},
            {"role": "assistant", "content": output_text}
        ]
    }
junelee/sharegpt_deepl_ko
- Structure: instruction + input + output
- Combine input with instruction if present.
dataset = load_dataset("junelee/sharegpt_deepl_ko", data_files="ko_alpaca_style_dataset.json", split="train")

def convert_to_messages(example):
    instruction = example.get("instruction", "").strip()
    input_text = example.get("input", "").strip()
    output_text = example.get("output", "").strip()
    if not output_text:
        return None
    prompt = instruction if not input_text else f"{instruction}\n\n{input_text}"
    return {
        "messages": [
            {"role": "user", "content": prompt},
            {"role": "assistant", "content": output_text}
        ]
    }
4. Configuring NeMo Environment and Namespace
Before starting fine-tuning, you must ensure that the Entity Store and Data Store namespaces are correctly registered.
- The Entity Store namespace is automatically created when deploying the NeMo catalog.
- The Data Store namespace is automatically registered upon creation of a dataset repository.
So, you don’t need to manually create namespaces. However, you should verify their availability using the SDK and REST API.
4.1 Verify Service Endpoints
Initialize the NeMo Microservices SDK client and check that the endpoints for Data Store / Entity Store / NIM are correctly connected.
import os
import json
import random
import requests
from openai import OpenAI
from nemo_microservices import NeMoMicroservices
from config import *

# Initialize NeMo Microservices SDK client
nemo_client = NeMoMicroservices(
    base_url=NEMO_URL,
    inference_base_url=NIM_URL,
)
print(f"Data Store endpoint: {NDS_URL}")
print(f"Entity Store, Customizer, Evaluator endpoint: {NEMO_URL}")
print(f"NIM endpoint: {NIM_URL}")
print(f"Namespace: {NMS_NAMESPACE}")
print(f"Base Model for Customization: {BASE_MODEL}@{BASE_MODEL_VERSION}")
4.2 Configure Data Paths
Set the paths of the prepared training data and validate that the files exist.
# Path where data preparation notebook saved fine-tuning and evaluation data
DATA_ROOT = os.path.join(os.getcwd(), "data")
CUSTOMIZATION_DATA_ROOT = os.path.join(DATA_ROOT, "customization")
VALIDATION_DATA_ROOT = os.path.join(DATA_ROOT, "validation")
EVALUATION_DATA_ROOT = os.path.join(DATA_ROOT, "evaluation")

# Sanity checks
train_fp = f"{CUSTOMIZATION_DATA_ROOT}/training.jsonl"
assert os.path.exists(train_fp), f"The training data at '{train_fp}' does not exist. Please ensure that the data was prepared successfully."

val_fp = f"{VALIDATION_DATA_ROOT}/validation.jsonl"
assert os.path.exists(val_fp), f"The validation data at '{val_fp}' does not exist. Please ensure that the data was prepared successfully."

test_fp = f"{EVALUATION_DATA_ROOT}/evaluation.jsonl"
assert os.path.exists(test_fp), f"The test data at '{test_fp}' does not exist. Please ensure that the data was prepared successfully."
4.3 Create Data Store Repository and Verify Namespace
First, create a dataset repository in the NeMo Data Store, and then verify that the namespace has been registered properly.
The NeMo Data Store supports dataset management through Hugging Face Hub API (HfApi) compatibility.
- Note: This process does not communicate with Hugging Face servers; the
HfApiclient interacts only with the NeMo Data Store.
from huggingface_hub import HfApi

repo_id = f"{NMS_NAMESPACE}/{DATASET_NAME}"
hf_api = HfApi(endpoint=f"{NDS_URL}/v1/hf", token="")

# Create repo
hf_api.create_repo(
    repo_id=repo_id,
    repo_type='dataset',
)
Verify both Data Store and Entity Store namespaces:
# Verify Namespace in Data Store
response = requests.get(f"{NDS_URL}/v1/datastore/namespaces/{NMS_NAMESPACE}")
print(f"Data Store - Status Code: {response.status_code}\nResponse JSON: {response.json()}")

# Verify Namespace in Entity Store
namespace_obj = nemo_client.namespaces.retrieve(namespace_id=NMS_NAMESPACE)
print(f"\nEntity Store - Namespace: {namespace_obj.id}")
print(f"Created at: {namespace_obj.created_at}")
print(f"Description: {namespace_obj.description}")
print(f"Project: {namespace_obj.project}")

- Note:
- List namespaces:
- Data Store →requests.get(f"{NDS_URL}/v1/datastore/namespaces/")
- Entity Store →nemo_client.namespaces.list() - Delete namespace:
- Data Store →requests.delete(f"{NDS_URL}/v1/datastore/namespaces/{namespace}")
- Entity Store →nemo_client.namespaces.delete(namespace)
- List namespaces:
5. Upload Data and Register with Entity Store
Upload the prepared dataset to the NeMo Data Store, then register it in the Entity Store so it can be referenced during fine-tuning.
5.1 Upload Data to Data Store
- Upload dataset files – Upload training, validation, and evaluation JSONL files separately.
training/folder → Training datavalidation/folder → Validation data
hf_api.upload_file(path_or_fileobj=train_fp,
    path_in_repo="training/training.jsonl",
    repo_id=repo_id,
    repo_type='dataset',
)

hf_api.upload_file(path_or_fileobj=val_fp,
    path_in_repo="validation/validation.jsonl",
    repo_id=repo_id,
    repo_type='dataset',
)

hf_api.upload_file(path_or_fileobj=test_fp,
    path_in_repo="testing/evaluation.jsonl",
    repo_id=repo_id,
    repo_type='dataset',
)

print("All data files uploaded successfully!")
- Verify upload – Check the file tree inside the repository.
import requests

url = f"{NDS_URL}/v1/hf/api/datasets/{repo_id}/tree/main"
headers = {"Authorization": f"Bearer {''}"}  # provide token if required

response = requests.get(url, headers=headers)

if response.status_code == 200:
    tree = response.json()
    for entry in tree:
        print(entry)
else:
    print("Request failed:", response.status_code, response.text)

5.2 Register Dataset with Entity Store
Once uploaded to the Data Store, register the dataset in the Entity Store so it can be referenced by namespace and name.
- Create dataset
dataset = nemo_client.datasets.create(
    name=DATASET_NAME,
    namespace=NMS_NAMESPACE,
    description="Evaluation set for KoAlpaca fine-tuned LLaMA3",
    files_url=f"hf://datasets/{NMS_NAMESPACE}/{DATASET_NAME}",
    project="korean-finetune",
)
print(f"Created dataset: {dataset.namespace}/{dataset.name}")
dataset
- Verify registration
dataset_obj = nemo_client.datasets.retrieve(namespace=NMS_NAMESPACE, dataset_name=DATASET_NAME)

print("Files URL:", dataset_obj.files_url)
assert dataset_obj.files_url == f"hf://datasets/{repo_id}"

6. Running LoRA Fine-Tuning
We fine-tune the model using Supervised Fine-Tuning (SFT) + LoRA with the KoAlpaca dataset.
This involves configuring hyperparameters, launching a customization job, monitoring its status, and reviewing the resulting custom model.
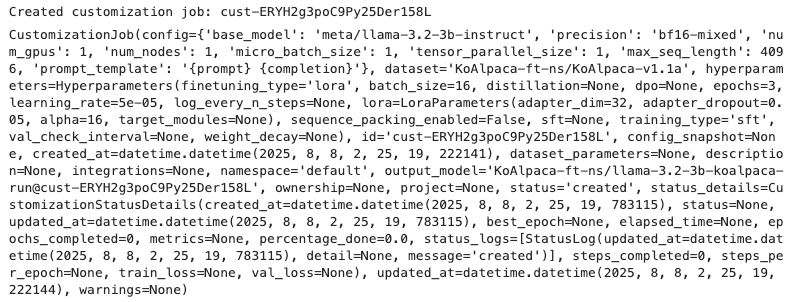
6.1 Create Training Job
Set hyperparameters and launch the customization job.
If you’re using Weights & Biases (WandB) for logging, include the API key in the request headers.
# Create customization job
if WANDB_API_KEY:
    client_with_wandb = nemo_client.with_options(default_headers={"wandb-api-key": WANDB_API_KEY})
else:
    client_with_wandb = nemo_client

customization = client_with_wandb.customization.jobs.create(
    name="llama-3.2-3b-koalpaca-ft",
    output_model=f"{NMS_NAMESPACE}/llama-3.2-3b-koalpaca-run",
    config=BASE_MODEL,
    dataset={"name": DATASET_NAME, "namespace": NMS_NAMESPACE},
    hyperparameters={
        "training_type": "sft",
        "finetuning_type": "lora",
        "epochs": 3,
        "batch_size": 16,
        "learning_rate": 5e-5,
        "lora": {
            "adapter_dim": 32,
            "adapter_dropout": 0.05
        }
    }
)
print(f"Created customization job: {customization.id}")
customization
Production Best Practices:
To standardize setups, pre-register Customization targets and Customization configs and reference them by name.
Example:config = "my-custom-config"
Store the Job ID and output model name as variables.
JOB_ID = customization.id
customization = nemo_client.customization.jobs.retrieve(JOB_ID)

CUSTOMIZED_MODEL = customization.output_model
Cancel Job:
Usenemo_client.customization.jobs.cancel(job_id=JOB_ID)if needed.
6.2 Monitor Training Status
Retrieve the job’s progress:
job_status = nemo_client.customization.jobs.status(job_id=JOB_ID)

print("Percentage done:", job_status.percentage_done)
print("Job Status:", json.dumps(job_status.model_dump(), indent=2, default=str))
percentage_done: 100.0"status": "completed"
When both appear, training is finished.
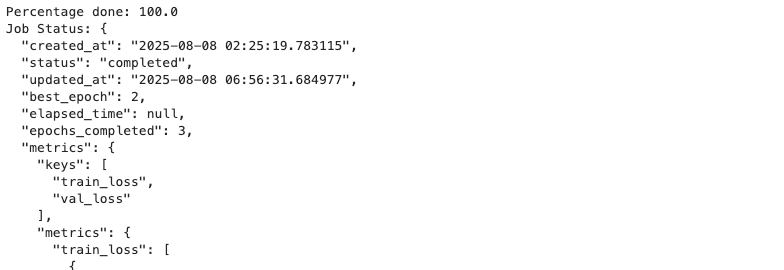
Training logs will include metrics like training loss and validation loss by step.
Percentage done: 100.0
Job Status: {
  "created_at": "2025-08-08 02:25:19.783115",
  "status": "completed",
  "updated_at": "2025-08-08 06:56:31.684977",
  "best_epoch": 2,
  "elapsed_time": null,
  "epochs_completed": 3,
  "metrics": {
    "keys": [
      "train_loss",
      "val_loss"
    ],
    "metrics": {
      "train_loss": [
        {
          "step": 9,
          "timestamp": "2025-08-08T02:37:22.090967",
          "value": 2.6579394340515137
        },
        {
          "step": 19,
          "timestamp": "2025-08-08T02:38:02.087267",
          "value": 2.5957703590393066
        },
        {
          "step": 29,
          "timestamp": "2025-08-08T02:38:41.759720",
          "value": 2.602855682373047
        },
        ...
6.3 Verify Custom Model
Once training completes, verify the generated model in the Entity Store.
List models
models_page = nemo_client.models.list(
    filter={"namespace": NMS_NAMESPACE},
    sort="-created_at"
)

print(f"Found {len(models_page.data)} models in namespace {NMS_NAMESPACE}:")
for model in models_page.data:
    print(f"\nModel: {model.name}")
    print(f"  Namespace: {model.namespace}")
    print(f"  Base Model: {model.base_model}")
    print(f"  Created: {model.created_at}")
    if model.peft:
        print(f"  Fine-tuning Type: {model.peft.finetuning_type}")

Retrieve model details
model = nemo_client.models.retrieve(namespace=NMS_NAMESPACE, model_name=CUSTOMIZED_MODEL.split("/")[1])

print(f"Model: {model.namespace}/{model.name}")
print(f"Base Model: {model.base_model}")
print(f"Status: {model.artifact.status}")
7. Deploying the Custom Model for Inference
When LoRA fine-tuning is completed, the Custom model is automatically registered if its Base model (e.g., meta/llama-3.2-3b-instruct) is already deployed as a NIM service.
If the Base model does not have an existing NIM service, you need to manually deploy a NIM service to enable inference with the Custom model.
7.1 Deploying the Base Model to NIM
To deploy the Base model as a NIM service, use the NeMo Deployment API. Below is an example of deploying the llama-3.2-3b-instruct model:
url = f"{NEMO_URL}/v1/deployment/model-deployments"

payload = {
    "name": "llama-3.2-3b-instruct",
    "namespace": "meta",
    "config": {
        "model": "meta/llama-3.2-3b-instruct",
        "nim_deployment": {
            "image_name": "nvcr.io/nim/meta/llama-3.2-3b-instruct",
            "image_tag": "1.10.1",
            "pvc_size": "25Gi",
            "gpu": 1,
            "additional_envs": {
                "NIM_GUIDED_DECODING_BACKEND": "outlines",
                "NGC_API_KEY": "YOUR_NGC_API_KEY", # Insert your NGC API key
            },
            "tolerations": [
                {
                    "key": "nvidia.com/gpu",
                    "operator": "Equal",
                    "value": "present",
                    "effect": "NoSchedule"
                }
            ]
        }
    }
}

headers = {
    "accept": "application/json",
    "Content-Type": "application/json",
}

resp = requests.post(url, headers=headers, json=payload, verify=False)
resp.raise_for_status()

print("Create deployment response:")
print(json.dumps(resp.json(), indent=2))
- Note:
- You must obtain an
NGC_API_KEYfrom NVIDIA NGC.
- You must obtain an
7.2 Verify Deployment
Once deployment is complete, you can confirm by listing models available via the NIM endpoint. If the Custom model appears in the list, it is ready for inference.
# Check if the custom LoRA model is hosted by NVIDIA NIM
models = nemo_client.inference.models.list()
model_names = [model.id for model in models.data]

print(model_names)

- Note:
- If the base model’s NIM service is already deployed, the custom model is immediately available for inference with no additional deployment steps.
8. Inference Testing (Base vs Custom)
By sending prompts to the NIM endpoint of the model, we compare the inference performance of the Base model and the fine-tuned Custom model.
8.1 Inference Client Setup
Specify the Base model and the Custom model to be used for inference.
BASE_MODEL = "meta/llama-3.2-3b-instruct"

print(f"Base Model: {BASE_MODEL}")
print(f"Custom Model: {CUSTOMIZED_MODEL}")
Method 1 — Using OpenAI-Compatible API
inference_client = OpenAI(
  base_url = f"{NIM_URL}/v1",
  api_key = "None"
)

messages = [{'role': 'user', 'content': 'Your comments.'}]

completion = inference_client.chat.completions.create(
  model = CUSTOMIZED_MODEL,
  messages = messages,
  temperature = 0.3,
  top_p = 0.8,
  max_tokens = 256,
  frequency_penalty=0.9,
  presence_penalty=0.3,
  stream = False
)

completion.choices[0].message.content
Method 2 — Using nemo_microservices Library
completion = nemo_client.chat.completions.create(
    model = BASE_MODEL,
    messages = messages,
    temperature = 0.3,
    top_p = 0.8,
    max_tokens = 256,
    frequency_penalty=0.9,
    presence_penalty=0.3,
    stream = False
)

print(completion.choices[0].message.content)
8.2 Example Prompts
We compared and analyzed the responses of the Base and Custom models using the following five example prompts:
# Example 1: Simple factual request
messages = [{'role': 'user', 'content': '사과의 효능 두 가지만 말해줘'}]

# Example 2: Concept explanation
messages = [{'role': 'user', 'content': '크리스마스에 대해 설명해줘.'}]

# Example 3: Local information
messages = [{'role': 'user', 'content': '인천은 무슨 도시인가요?'}]

# Example 4: Cultural explanation
messages = [{'role': 'user', 'content': '한국의 아이돌 문화에 대해 알려주세요.'}]

# Example 5: Request for structured JSON output
messages=[
    {
        "role": "user",
        "content": """요구 스키마:
{
  "title": "string",
  "pros": ["string", "string"],
  "cons": ["string", "string"]
}

스마트폰 대비 태블릿의 장단점을 pros/cons 배열에 각각 2개씩 채워 JSON으로 작성하세요."""
    }
]
9. Performance Evaluation and Analysis
9.1 Analysis of Inference Results
We compared the responses from the Base and Custom models for each prompt and analyzed the improvements.
Example 1: “사과의 효능 두 가지만 말해줘”
- Base Model Response:
사과는 다양한 건강에益을 주는 효능이 있습니다. 두 가지 주요 효능은 다음과 같습니다.

1. 항산화 효과: 사과에는 항산화 성분인 폴리페놀이 풍부하게 함유되어 있습니다. 이 성분은 세포의 손상을 방지하고, 세포의 산화를 막아주어 노화와 질병의 원인이 되는 산화물질을 제거합니다.

2. 혈압 조절: 사과는 혈압을 낮추고 혈관을 확장시켜 혈액순환을 촉진시키는 효과가 있습니다. 이로 인해 심장병, 고혈압 등의 질병에 효과적입니다.

또한, 사과에는 다양한 영양소가 풍부하게 함유되어 있어 건강에 좋은 영향을 미칠 수 있습니다.
Issues:Mixed character (益)Explanations overly simple, lacking specific detail
- Custom Model Response:
사과는 다양한 건강에 좋은 효능을 가지고 있습니다.

1. 항산화 효과: 사과에는 항산화 성분인 비타민 C가 풍부하게 함유되어 있어 체내에서 산소를 방지하여 체내 산소를 방지하는 역할을 합니다. 또한, 사과에는 항산화 성분인 비타민 E가 많이 함유되어 있어 체내에서 산소를 방지하여 체내 산소를 방지하는 역할을 합니다.

2. 혈압 조절: 사과는 혈압을 조절하는 데에도 효과적입니다. 사과에는 비타민 C와 비타민 E가 많이 함유되어 있어 혈관을 확장시켜 혈압을 낮추는 역할을 합니다. 또한, 사과에는 항산화 성분이 많아 체내에서 산소를 방지하여 혈압을 낮추는 역할을 합니다.

위의 두 가지 효능 외에도, 사과는 신장 건강에 좋고, 피부 건강에도 좋은 효과를 가지고 있습니다.
→ Improvement: Removed unnecessary Chinese character, made the components and effects more specific, and extended the explanation.
Example 2: “크리스마스에 대해 설명해줘”
- Base Model Response:
크리스마스는 기독교의 기념일로, 기독교의 성인 예수 그리스도와 그의 어머니 마리아의 생일을 기념하는 날입니다. 크리스마스는 25일과 26일을 기념하는 날로, 25일은 예수 그리스도의 태어날을 기념하고, 26일은 그의 죽음을 기념합니다.

크리스마스는 크리스마스 트리, 크리스마스 선물, 크리스마스 음악, 크리스마스 식사 등 다양한 전통과 관습으로 알려져 있습니다. 크리스마스 트리는 주로 evergreen 나무를 사용하여 만든 트리이며, 그 위에 장식품과ไฟ를 장식합니다. 크리스마스 선물은 가족과 친구에게 선물하는 물건으로, 종종 예술品이나 전시品을 포함합니다.

크리스마스의 전통은 유럽에서 시작되었으며, 현재 세계적으로 많은 국가에서 celebrations를 합니다. 크리스마스는 가족과 친구와 함께 시간을 보내는 날로, 많은 사람들은 크리스마스 트리 подneath에 선물을 받고, 크리스마스 음악을 듣
Issues:Factual error: The 26th is not a day to commemorate his deathMixed foreign words (evergreen)Unclear narrative flow- Custom Model Response:
크리스마스는 기독교의 성경에서 언급된 예수 그리스도와 그의 어머니 마리아의 탄생을 기념하는 기념일입니다. 크리스마스는 기독교의 주일 중 하나로, 예수 그리스도의 탄생을 기념하는 날입니다. 크리스마스 전날인 '크리스마스 전야'는 예수 그리스도의 탄생을 기념하는 날이며, 크리스마스날에는 가족과 친구들과 함께 즐기며, 선물 주고 받는 등 다양한 행사들이 이루어집니다. 크리스마스는 세계적으로 많은 나라에서 기념되며, 크리스마스 트리와 크리스마스 카트, 크리스마스 선물 등 다양한 문화적 요소가 있습니다.
→ Improvement: Corrected the date error, removed unnecessary foreign words, improved the flow, and emphasized fixing the date error.
Example 3: “인천은 무슨 도시인가요?”
- Base Model Response:
인천은 한국의 도시 중 하나로, 인천광역시로 구성되어 있습니다. 인천은 한국의 가장 큰 해상도시 중 하나로, 동아시아에서 가장 큰 해상 무역 센터 중 하나입니다. 인천은 한국의 수도인 서울과 함께 수도권 지역의 중심지로, 많은 산업과 경제 활동을 수행합니다.

인천은 해상 무역과 항구 활동이 중요한 역할을 하고 있으며, 세계의 많은 국가와의 무역을 facilitated합니다. 또한, 인천은 한국의 문화와 예술을 전파하는 중요한 역할을 하고 있으며, 많은 예술가와 문화인들이 거주하고 있습니다.

인천은 또한 한국의 교육 및 연구 활동에 중요한 역할을 하고 있으며, 많은 대학과 연구소가 있습니다. 인천은 또한 한국의 tourism industry에 중요한 역할을 하고 있으며, 많은 관광객들이 인천을 방문합니다.

总之, 인천은 한국의 중요한 도시로, 경제, 문화, 교육 및 tourism industry에 중요한 역할을 하고 있습니다.
Issues:English word (facilitated) and Chinese (总之) mixed inA disjointed list of facts without a clear focus
- Custom Model Response:
인천은 한국의 제1도시 중 하나입니다. 인천은 한국의 수도인 서울과는 다른 지역으로, 서울에서 남쪽으로 약 50km 떨어져 있습니다. 인천은 해안가에 위치해 있으며, 해양과학, 항공, 해상운송 등 다양한 산업이 발달하고 있습니다. 인천은 세계적인 항구로 자리 잡고 있으며, 세계적인 항공사들이 인천공항을 이용합니다. 또한, 인천은 문화와 관광이 풍부한 도시로, 인도네시아, 태국, 베트남 등 동남아시아 국가들과의 교류가 많습니다.
→ Improvement: Removed foreign words, and structured the information around three axes: industry, airport, and tourism.
Example 4: “한국의 아이돌 문화에 대해 알려주세요”
- Base Model Response:
한국의 아이돌 문화는 한국에서 가장 인기를 끌고 있는 문화 중 하나입니다. 아이돌은 한국에서 "아이다"라고도 불리며, 한국의 음악, 댄스, 연기 등 다양한 분야에서 활동하는 예술가입니다.

한국의 아이돌 문화는 1990년대에 시작되었으며, 이 시기에는 K-POP이 처음으로 발전하기 시작했습니다. K-POP은 한국의 음악을 세계로 전파하는 데 중요한 역할을했습니다. 현재, 한국의 아이돌은 세계적으로 많은 인기를 끌고 있습니다.

한국의 아이돌은 일반적으로 다음 세 가지 분야에 분할됩니다.

1. **음악**: 음악은 한국의 아이돌 문화에서 가장 중요한 분야입니다. K-POP은 한국의 음악을 세계로 전파하는 데 중요한 역할을했습니다. K-POP 그룹은 일반적으로 4-6 명의 멤버로 구성되어 있으며, 각 멤버가 다른ดนตร리와 보컬을 연주합니다.
2. **연기**: 연기는 한국의 아이돌 문화에서 두 번째로 중요한 분야입니다. 한국의 아이돌은 일반적으로 영화와 텔레비전 드라마
Issues:Incorrect term (아이다)Thai text mixed in (ดนตร리)Lack of concrete details
- Custom Model Response:
한국의 아이돌 문화는 1990년대 초반부터 시작되었습니다. 이 시기에는 한국에서 처음으로 아이돌이 등장하였으며, 이후 미국에서 유명한 K-POP이 발전하게 되었습니다. 한국의 아이돌은 주로 여성 아이돌 그룹으로 구성되어 있으며, 대표적인 그룹으로는 S.E.S, Shinhwa, H.O.T, TVXQ, Girls' Generation 등이 있습니다. 이들 그룹들은 한국에서 큰 인기를 얻었으며, 이후 세계적으로도 유명해졌습니다.

한국의 아이돌 문화는 현재까지도 매우 활발하게 진행되고 있습니다. 최근에는 K-POP이 세계적으로 유명해졌으며, 한국의 아이돌은 세계적으로 많은 인기를 얻고 있습니다. 또한, 한국의 아이돌은 다양한 장르를 포함하며, 음악뿐만 아니라 댄스, 뮤지컬 등 다양한 분야에서도 활동하고 있습니다.

한국의 아이돌 문화는 다양한 요인들이 작용하여 발전하게 되었습니다. 예를 들어, 1990년대 초반에는 한국에서 처음으로 아이돌이 등장하였으며, 이후 미국에서 유명한 K-POP이 발
→ Improvement: Correct terminology, removed foreign words, chronological order clarified, added representative group examples.
Example 5: “스마트폰 대비 태블릿 장단점 (JSON 형식)”
- Base Model Response:
{"title": "스마트폰 대비 태블릿", "pros": ["대용량 스토리지", "장기 사용 가능"], "cons": ["작은 màn화", "가볍지 않음"]}
Issues:Vietnamese word mixed in (màn)Flat key-value pairs, lacking explanation- Custom Model Response:
스마트폰 대비 태블릿의 장단점을 pros/cons 배열에 각각 2개씩 채워 JSON으로 작성한 결과는 다음과 같습니다.

\```json
{
  "title": "스마트폰 대비 태블릿",
  "pros": [
    {
      "point": "대형 화면",
      "description": "대형 화면으로 영화나 게임을 즐길 수 있습니다."
    },
    {
      "point": "장기 사용 가능",
      "description": "장기 사용 가능하여 휴대용이 아닌 집에서 사용할 수 있습니다."
    }
  ],
  "cons": [
    {
      "point": "무게와 크기",
      "description": "무게와 크기가 큰 단점이 있습니다."
    },
    {
      "point": "사용자 수용성",
      "description": "사용자 수용성이 낮아 휴대가 어렵습니다."
    }
  ]
}
\```

위 결과는 스마트폰 대비 태블릿의 장단점을 JSON 형태로 표현한 것입니다. 단, 실제로 사용자 수용성이 낮은 점은 스마트폰 대비 태블릿이 일반적으로 사용자가
→ Improvement: Higher level of structuring, added description fields, better adherence to schema request.
9.2 Summary of Improvements by Example
| Example | Base Model | Custom Model | Improvement |
|---|---|---|---|
| 1 | Mixed character (益), overly simple | Pure Korean, concrete details | Consistency, more information |
| 2 | Wrong date, foreign words | Correct date, natural flow | Factual accuracy, improved narrative |
| 3 | English/Chinese mixed, unfocused | Structured by industry/airport/tourism | Removed noise, improved consistency |
| 4 | Wrong term, superficial explanations | Corrected terms, examples included | Context strengthened, more specificity |
| 5 | Simple key-value | Structured JSON with descriptions | Higher adherence to instructions, readability |
9.3 Overall Changes and Evaluation
Through the comparison of responses before and after fine-tuning, the following common improvements were observed:
- Accuracy: The model's reliability improved, with a noticeable reduction in factual errors related to dates, places, and concepts.
- Natural Korean: Foreign words and mixed scripts decreased, readability improved.
- Instruction adherence: JSON formatting, stepwise explanations, and specific schema requests were more faithfully followed.
- Information structuring: Responses became more concise, avoiding redundancy while focusing on key points.
10. Conclusion
Through LoRA fine-tuning on the KoAlpaca dataset, we confirmed that the LLaMA 3.2 3B model achieved significant improvements in Korean Q&A quality and instruction-following capability. In particular, common issues observed in the base model — such as factual errors (dates, places, concepts), mixing of foreign words and Hanja, and failure to follow instructions — were greatly reduced. The responses also became more structured and natural.
This demonstrates that even with a relatively small-scale model and efficient fine-tuning, it is possible to build a high-quality Korean model suitable for real-world service environments.
- Improvements
- Expression quality: Reduced use of foreign words and Hanja, with improved sentence flow and readability
- Accuracy: Fewer factual errors regarding dates, places, and other knowledge-based facts
- Instruction adherence: Higher success rates in handling complex requirements such as JSON formatting or step-by-step explanations
- Information structuring: Reduced redundancy and unnecessary content, with responses focusing more on key information
- Practical applications
- The same approach can be applied to develop domain-specialized small LLMs (sLLMs) for fields such as healthcare, finance, and law.
- Enables operation of high-quality Korean models even in resource-constrained environments.
- Future directions
- Increased training volume: More epochs or steps to improve handling of complex queries and long-form responses
- Hyperparameter optimization:
- Learning rate scheduling
- Batch size adjustments
- LoRA rank (
adapter_dim) tuning
- Data augmentation: Incorporating high-quality samples targeting error types frequently seen in the base model
- Domain-specific fine-tuning: Applying specialized datasets from fields such as healthcare, finance, and law
➡ In summary, compared to the base model, the customized model shows clear improvements in Korean fluency, factual accuracy, instruction compliance, and structured information delivery.
Note: In this post, we primarily evaluated fine-tuning effects through qualitative comparisons. A more detailed quantitative performance analysis using metrics such as ROUGE and F1 will be covered in a future article.